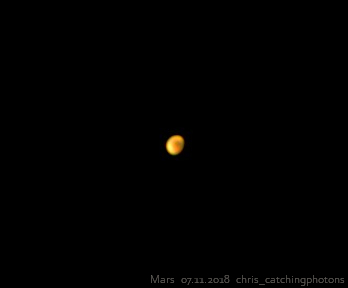
#12: 120′ of Orion & M33 – Mars & unguided Pleiades

07.11.2018

Mars using 3x barlow and Logitech webcam

New aspects: First use of modded Logitech webcam – Fist stacking of unguided DSLR shots

Acquisition:

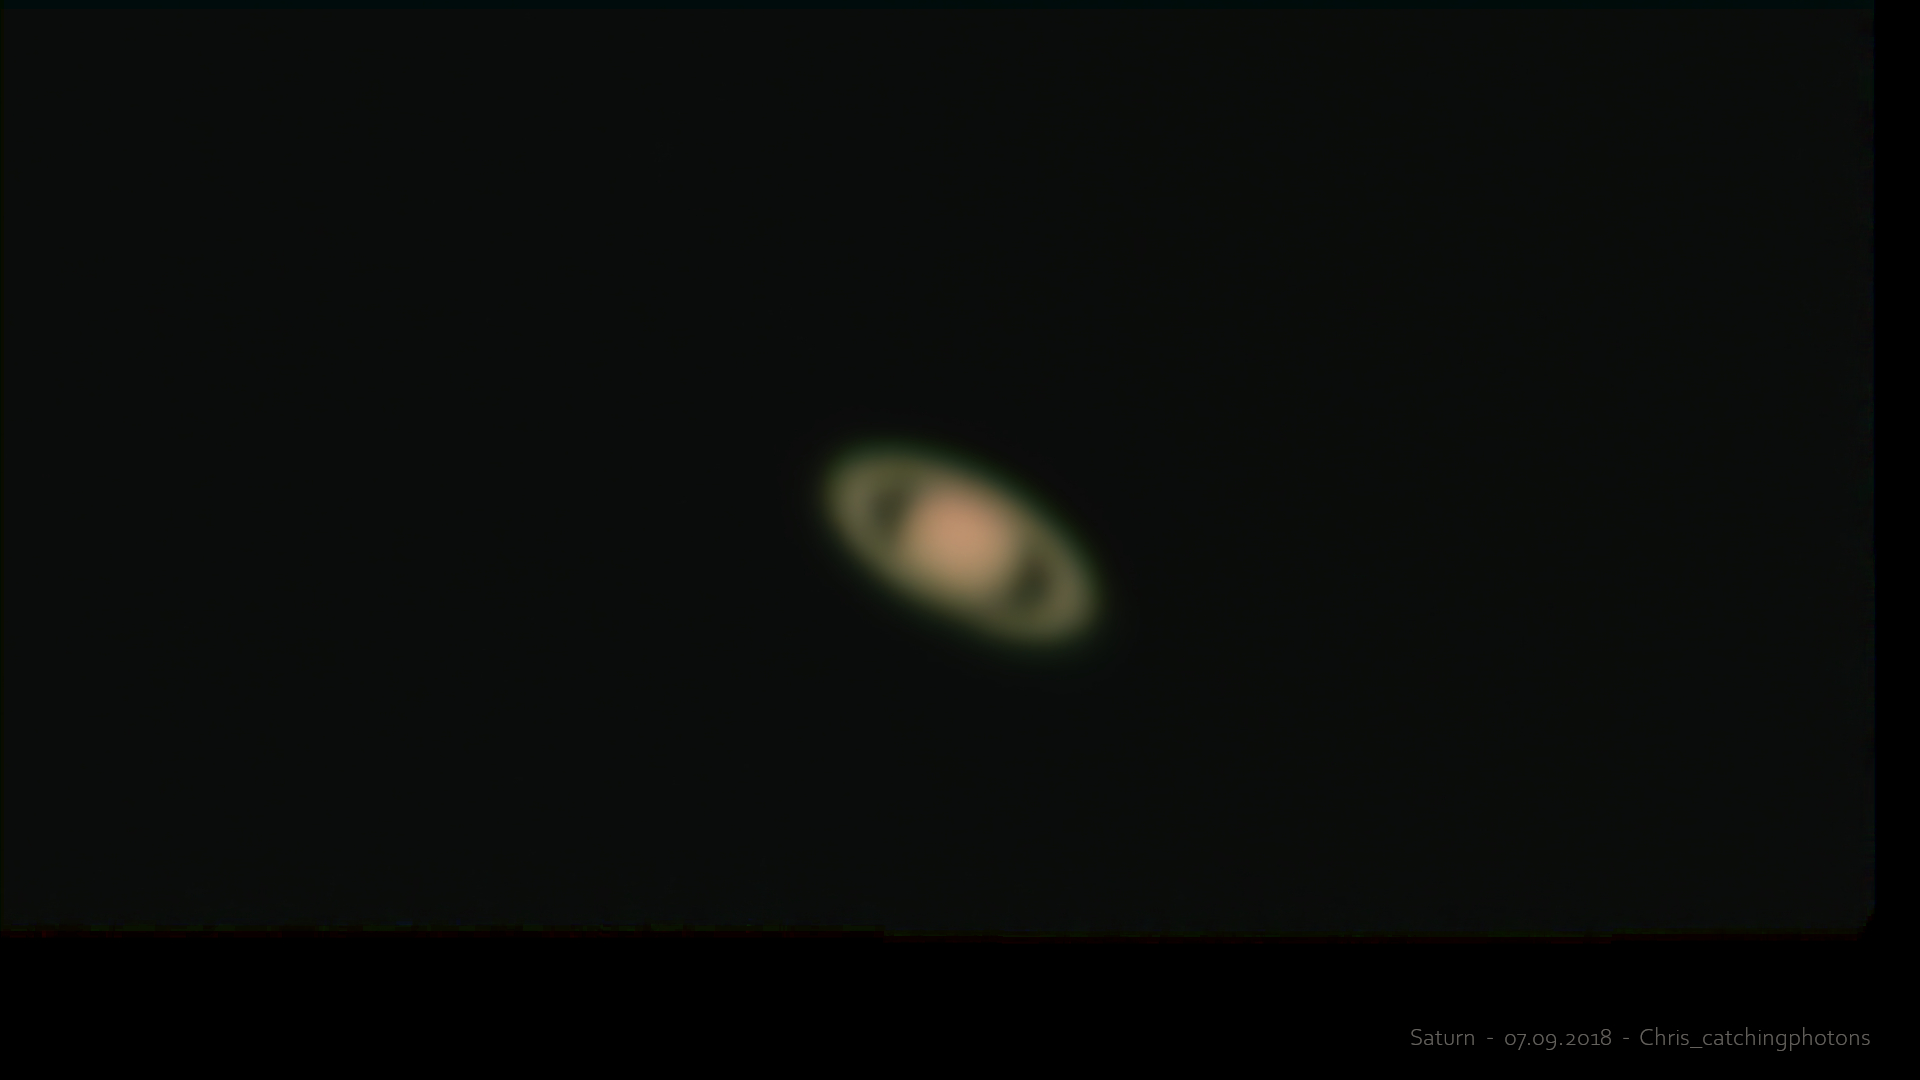
Mars: After fiddling around with the old Canon compact camera “PowerShot SX240 HS” held in front of my eyepieces I ordered a cheap Logitech webcam and modded it for the purpose of using it as an astro camera. The modification was quite simple: I removed the lens in front of the sensor and turned off the status LED. Then I glued an old film roll casing in front of the webcam. This casing happened to have exactly the same diameter as the 1 1/4” eyepieces (accident?). So with the help of “Sharpcap” and the drivers from Logitech I was able to grab a short .avi video of Mars with the camera in prime focus. I tried about ten videos with different exposure and gain settings refocusing between each videos. With the webcam and its drivers I got about 30 fps witch is not too bad for this modded equipment. On the SharpCap screen I could see Mars as a reddish disk wobbling around, showing me the bad seeing conditions. Nevertheless I actually could see some darker areas on the surface just by looking at the unstacked video files. A new area!

„#12: 120′ of Orion & M33 – Mars & unguided Pleiades“ weiterlesen

#11: Orion Nebula with Smartphone

03.11.2018

Orion with LG G6

New aspect: Capturing a DSO with a smartphone

Acquisition:

On a clear evening I tried to capture the Orion Nebula M42 with my Smartphone LG G4 f1.8. Therefore I needed to sort out some things: What is the maximum possible exposure length with the unknown focal length of my smartphone? I knew the 1/400-rule by which you need to divide the focal length of your camera by 400 to get the maximum exposure length without getting star trails. But the focal length of the inert lens system was unknown to me, so I needed to try different lengths and play around. Second thing was the right ISO setting. Stars should be visible but the background needed to be settle and dark enough. I ended up with ISO 400 and 20sec exposures.

„#11: Orion Nebula with Smartphone“ weiterlesen

#10: Early Saturn

13.10.2018

Saturn using 3x barlow and Logitech webcam

Acquisition:

This was a very short run on Saturn in the early morning. I got up earlier than usual and build up the rig outside in the dawn. Saturn was about to set when I was ready. I clipped the old compact Canon camera in front of the 10mm eyepiece with barlow lens attached. The kids took their chance to see Saturns rings on the display and I took the chance to take a few minutes of .mov video files.

„#10: Early Saturn“ weiterlesen

#9: Second try on M101

13.10.2019

M101 – 120sec subs @ ISO800

New aspect: better polar alignment & comparing two cameras

Acquisition:

The first camera I used was an Olympus E-5II. Then I had to change to an Olympus E510. This day I wanted to compare this two cameras by returning to M101. In the last weeks I had worked on polar alignment. Skywatcher offers a tool on their mounts to refine the polar alignment without a polar scope. In this procedure you slew to an alignment star and the mount will push this star out of the centre of your FOV. You then use the ALT/AZ knobs to recentre the star. Your polar alignment will then be refined. By fiddling with this tool I was able to refine the polar alignment in a way that makes 120 second exposures possible. Even on my small and overloaded mount like my Skywatcher EQ3 -Pro. I was quite impressed. Unfortunately something like half of the frames were wasted due to star stripes. But I tried my best and took a total of 40 x 120 second = 80 min. Cutting the ‘bad’ light frames out I was left with 17x 120 sec = 34 min of integrated exposure time on M101. Way to little for that tricky target. With 15 darks and 30 bias frames I tried to settle the noisy background.

„#9: Second try on M101“ weiterlesen

#8: Andromeda, Hercules and the Pleiades

11.10.2018

M45 – 5x 1min subs @ ISO400

New aspect: Coming back to already visited objects to enhance the quality

Acquisition:

M31 – Andromeda Galaxy: First I tried a second round on M31. As you might remember, M31 was one of the first DSO my brother and I visited. Back then we took little time to capture this beauty.
I had recently switched the camera to an Olympus E510 and this session I wanted to give this camera a try. The idea was not to touch exposure length (60’) and ISO (400) but to increase the amount of overall exposure time. I got 75min of exposure time and thought that would be OK. As you see, it took me a while to grasp on the fact that exposure time can’t be to long. Thumb rule for me now is: one hour for basic structure of the object – two hours for increased details and >2h for smother background and finder structures…. What ever. Back then I violated the “no more than one object a night”-rule every night.

„#8: Andromeda, Hercules and the Pleiades“ weiterlesen

#7: Bortle scale & dark skies

28.09.2018

Dark Sky – Open Sky with LG G6

New aspect:

My first conscious night under a real dark sky

Bortle scale and dark skies:

In northern Germany there are a few dark sky locations where population density is low enough. I spend a few days with my family in a holiday resort in exactly on of those dark spots. Before that occasion I never had appreciated a real dark sky from an astronomer perspective. But this time everything was different. There was a huge difference! I mean: nights are dark. But it’s a big difference between a dark night near a city and a really dark night. This was, when I googled the Bortle scale. This scale gives you an idea, what your sky is like at night. It takes different aspects your can observe under account. Things like cloud illumination or domes of light at the horizon, visible DSOs. From this list, my home sky is Bortle 6. The sky at my holiday apartment was more like Bortle 3. And that makes already a huge (!) difference.

„#7: Bortle scale & dark skies“ weiterlesen

#6: M101, Mars and Moon

24.09.2018

M101 – 60sec sub @ ISO800 using Olympus E-5II

New aspect: Finding DSOs in Stellarium and plan a DSO session

Acquisition:

M101: The days before this session i considered what DSO target to capture next. There are many factors I hadn’t figured out back then:

  • Where is your scope placed?
    • This is important for setting up. You don’t want to set everything up and running and then realising that your target will be well behind the neighbours garage all night. That’s just frustrating. So check the position of the object well before your session. See my DIY tutorial “getting your backyard into Stellarium” for further advice.
  • When does a “Deep Space Object” appear on the sky?
    • Here you use Stellarium or similar apps to figure out when to image. You want to use the precious time you have as good as possible. So planing the session in advance is important. When do you need to be ready? Where do you need to point?
  • When does it cross the meridian and you are forced to do a ‘meridian flip’?
    • A meridian flip is a manoeuvrer you are forced to preform, when the captured object crosses the north-south-axis on the sky. At this point the weights on your counter weight bar will rise higher and then above the scope. To avoid that and to keep the scope always above the weights, the scope will stop and you have to rotate 180° and then just keep on tracking. That is a hurdle in the middle of the night. You have to find the object again, align everything and then keep on capturing. I always try to avoid that manoeuvrer, but sometimes it’s inevitable to do so. Back then I really was trying not to… Too many factors.
  • What are good alignment stars for locating the object?
    • Errors in the mount will cause errors in the GOTO functions of the mount. So for my cheap SW EQ3 -Pro mount it means that you add together a lot of errors when slewing to a DSO from a distant alignment star. I therefore choose a nearby alignment star to reduce the amount of slewing error. So therefore I am forced to use a different set of alignment stars for every new DSO.
„#6: M101, Mars and Moon“ weiterlesen

#5: M13 and the first field trip

20.08.2018

M13 – 60sec @ ISO800

New aspect: First field trip with the rig

Acquisition:

For this target I met with a good friend of mine right in the middle of nowhere. The goal was to flee from city lights, so we chose what seemed to be a place, right in the middle of german no man’s land. It was the first time I packed the rig into the car and assembled it far away from the known grounds of my own backyard. There are multiple factors involved in doing so: where is flat ground? Where is north? Is the power supply line from the car to the scope long enough? Can we build the rigs right here, or is it property of someone else?

„#5: M13 and the first field trip“ weiterlesen

#4: First light for the DSLR – First Deep Space Object – Saturn again

18.09.2018

M31 – 12x 60sec @ ISO400

A few days before this session I purchased a T2-4/3 Olympus adapter ring to attach the old Olympus E510 DSLR (my brother lent me) to my Skywatcher 750/150 PDS. With such an adapter you can detach the lens of the DSLR and attach the scope instead as it will act as a lens for the DSLR.

Acquisition:

With this new equipment I aimed for my first deep sky object M31 the Andromeda Galaxy. I still had troubles polar aligning the mount but I found a Skywatcher procedure where one can first do a rough polar alignment, then tree-star star align the scope and then use a given guide star to refine the polar alignment. The mount slews to the guide star, then you correct for the occurring error and finally the mount reslews again and shifts the guide star out of the center. With the AZ and ALT bolts you then just recenter the guide star and refine polar alignment. A clever trick for users unable to see Polaris or users without a laptop and therefore without programs like phd2. With the refinement of the polar alignment I was now able to take 60 second long images without star trails.

„#4: First light for the DSLR – First Deep Space Object – Saturn again“ weiterlesen

#3: First light of Saturn & Mars

07.09.2018

Saturn using occular projection and Canon PowerShot SX240 HS

New aspect: First images taken with the old Canon SX240HS

Acquisition:

So after a while the sky cleared. I had some friends on board and after viewing some targets of the late summer (M31 and M13) we switched to the planets.
First we found Saturn on the sky. If you see Saturn and its rings for the first time you will know what I mean with ‚we gazed at Saturn‘. It was a breathtaking view. A tiny dot on the sky turns into a rotating planet with moons and a beautiful ring! In a hurry I pointed my smartphone above the eyepiece and see: the first astro photo of my life was taken!

„#3: First light of Saturn & Mars“ weiterlesen