& „It’s too much!“ – beginning backlash-errors or the EQ3 -Pro
29.04.2019 – 04.05.2019
New aspects:
– first time with an auto-guiding system
– Guiding shows first signs of overcapacity
– revisited a target for noise reduction
– first „proper“ galaxy
– longest project so far
Image acquisition:
So finally every part of my new guide-scope arrived and I could use phd2 for proper guiding for the first time!
Last session I had unsolvable difficulties with the guidecam, the „ToupTek Camera G-1200-KMB Mono Guider“. I stayed in touch with astroshop.de and they finally replaced my guidecam with another model, the ZWO ASI120mm mini-mono. This camera arrived and the current guiding setup now looks like this:
Guidecam:
- ZWO ASI120mm mini-mono
- ~ 150€
- CMOS-Chip (AR0130CS)
- 4,8mm x 3,6mm chip size
- 3,75 mm pixel size
- 1280×960 px resolution
Guidescope:
- Omegon Microspeed Guidescope 50mm
- 129€
- 200mm focal length
- 50mm aperture
The camera even has the same sensor chip but somehow the driver and connection circuits to the PC are different. Because: This time it worked like a charm – just right out of the box! So I was ready for the first target with auto-guiding!
Downside to the new guidescope with camera attached:
My rig is now officially overloaded! I need the counterweights to be a bit further out than possible. So the only way to go (except extra weights) is to extent the counterweight bar. So I carefully loosen the bar – thereby extending it a bit. It’s still super tight but this few centimetres enables me to get the scope into a balanced position. Not super nice – but it works for now.
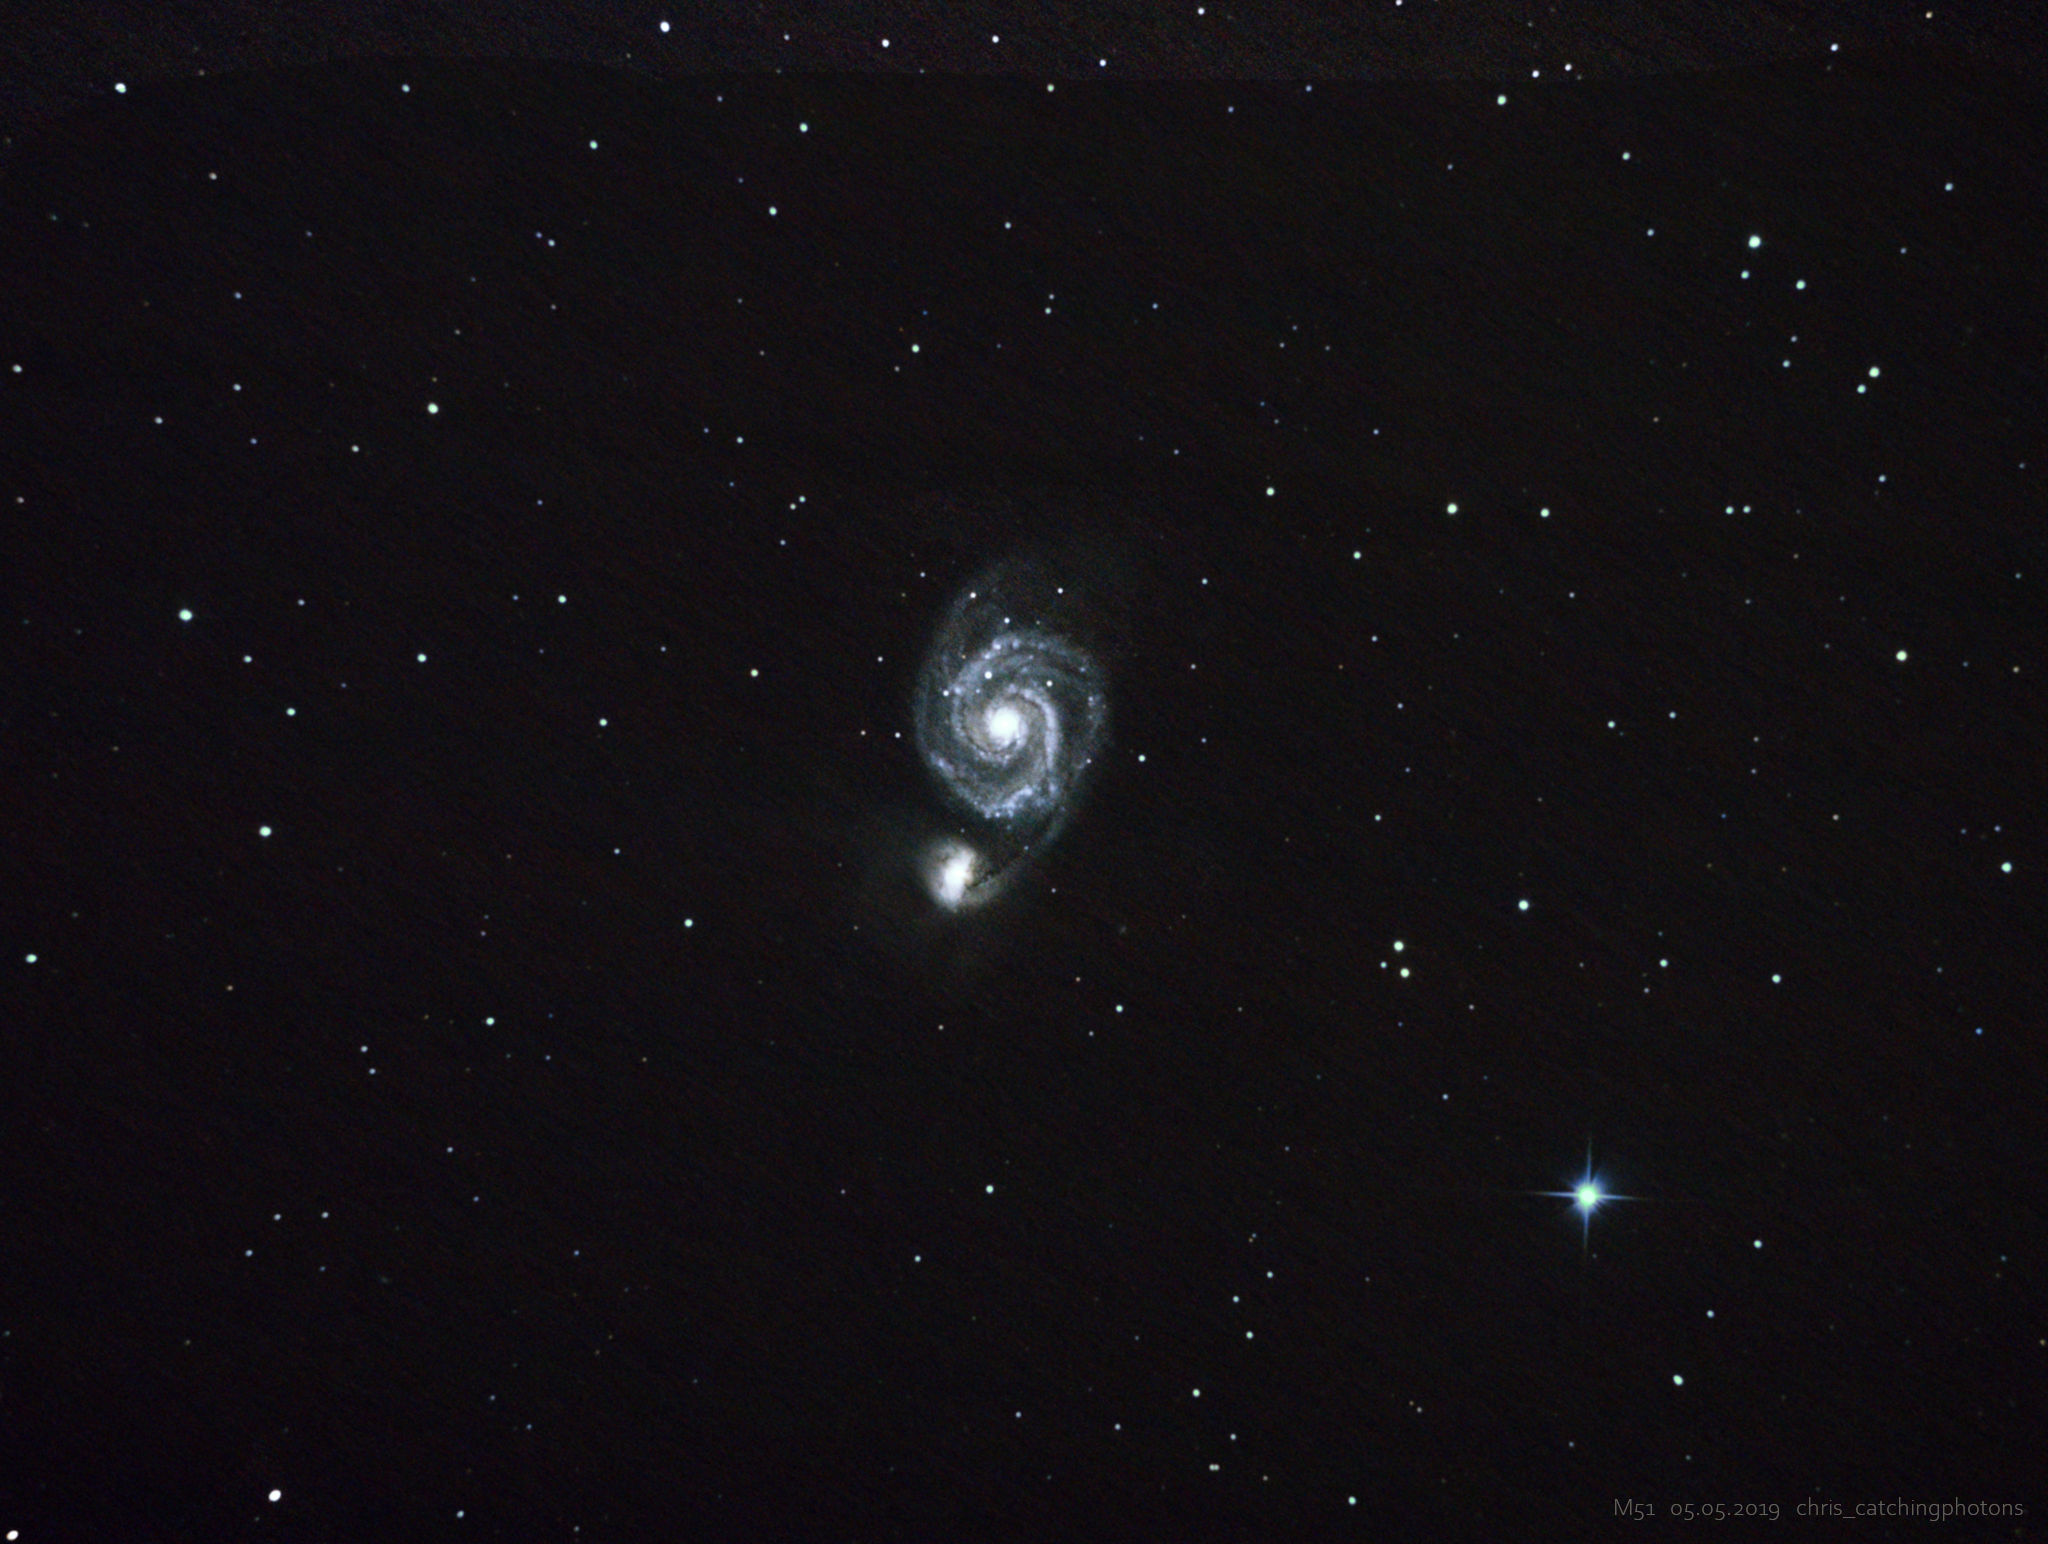
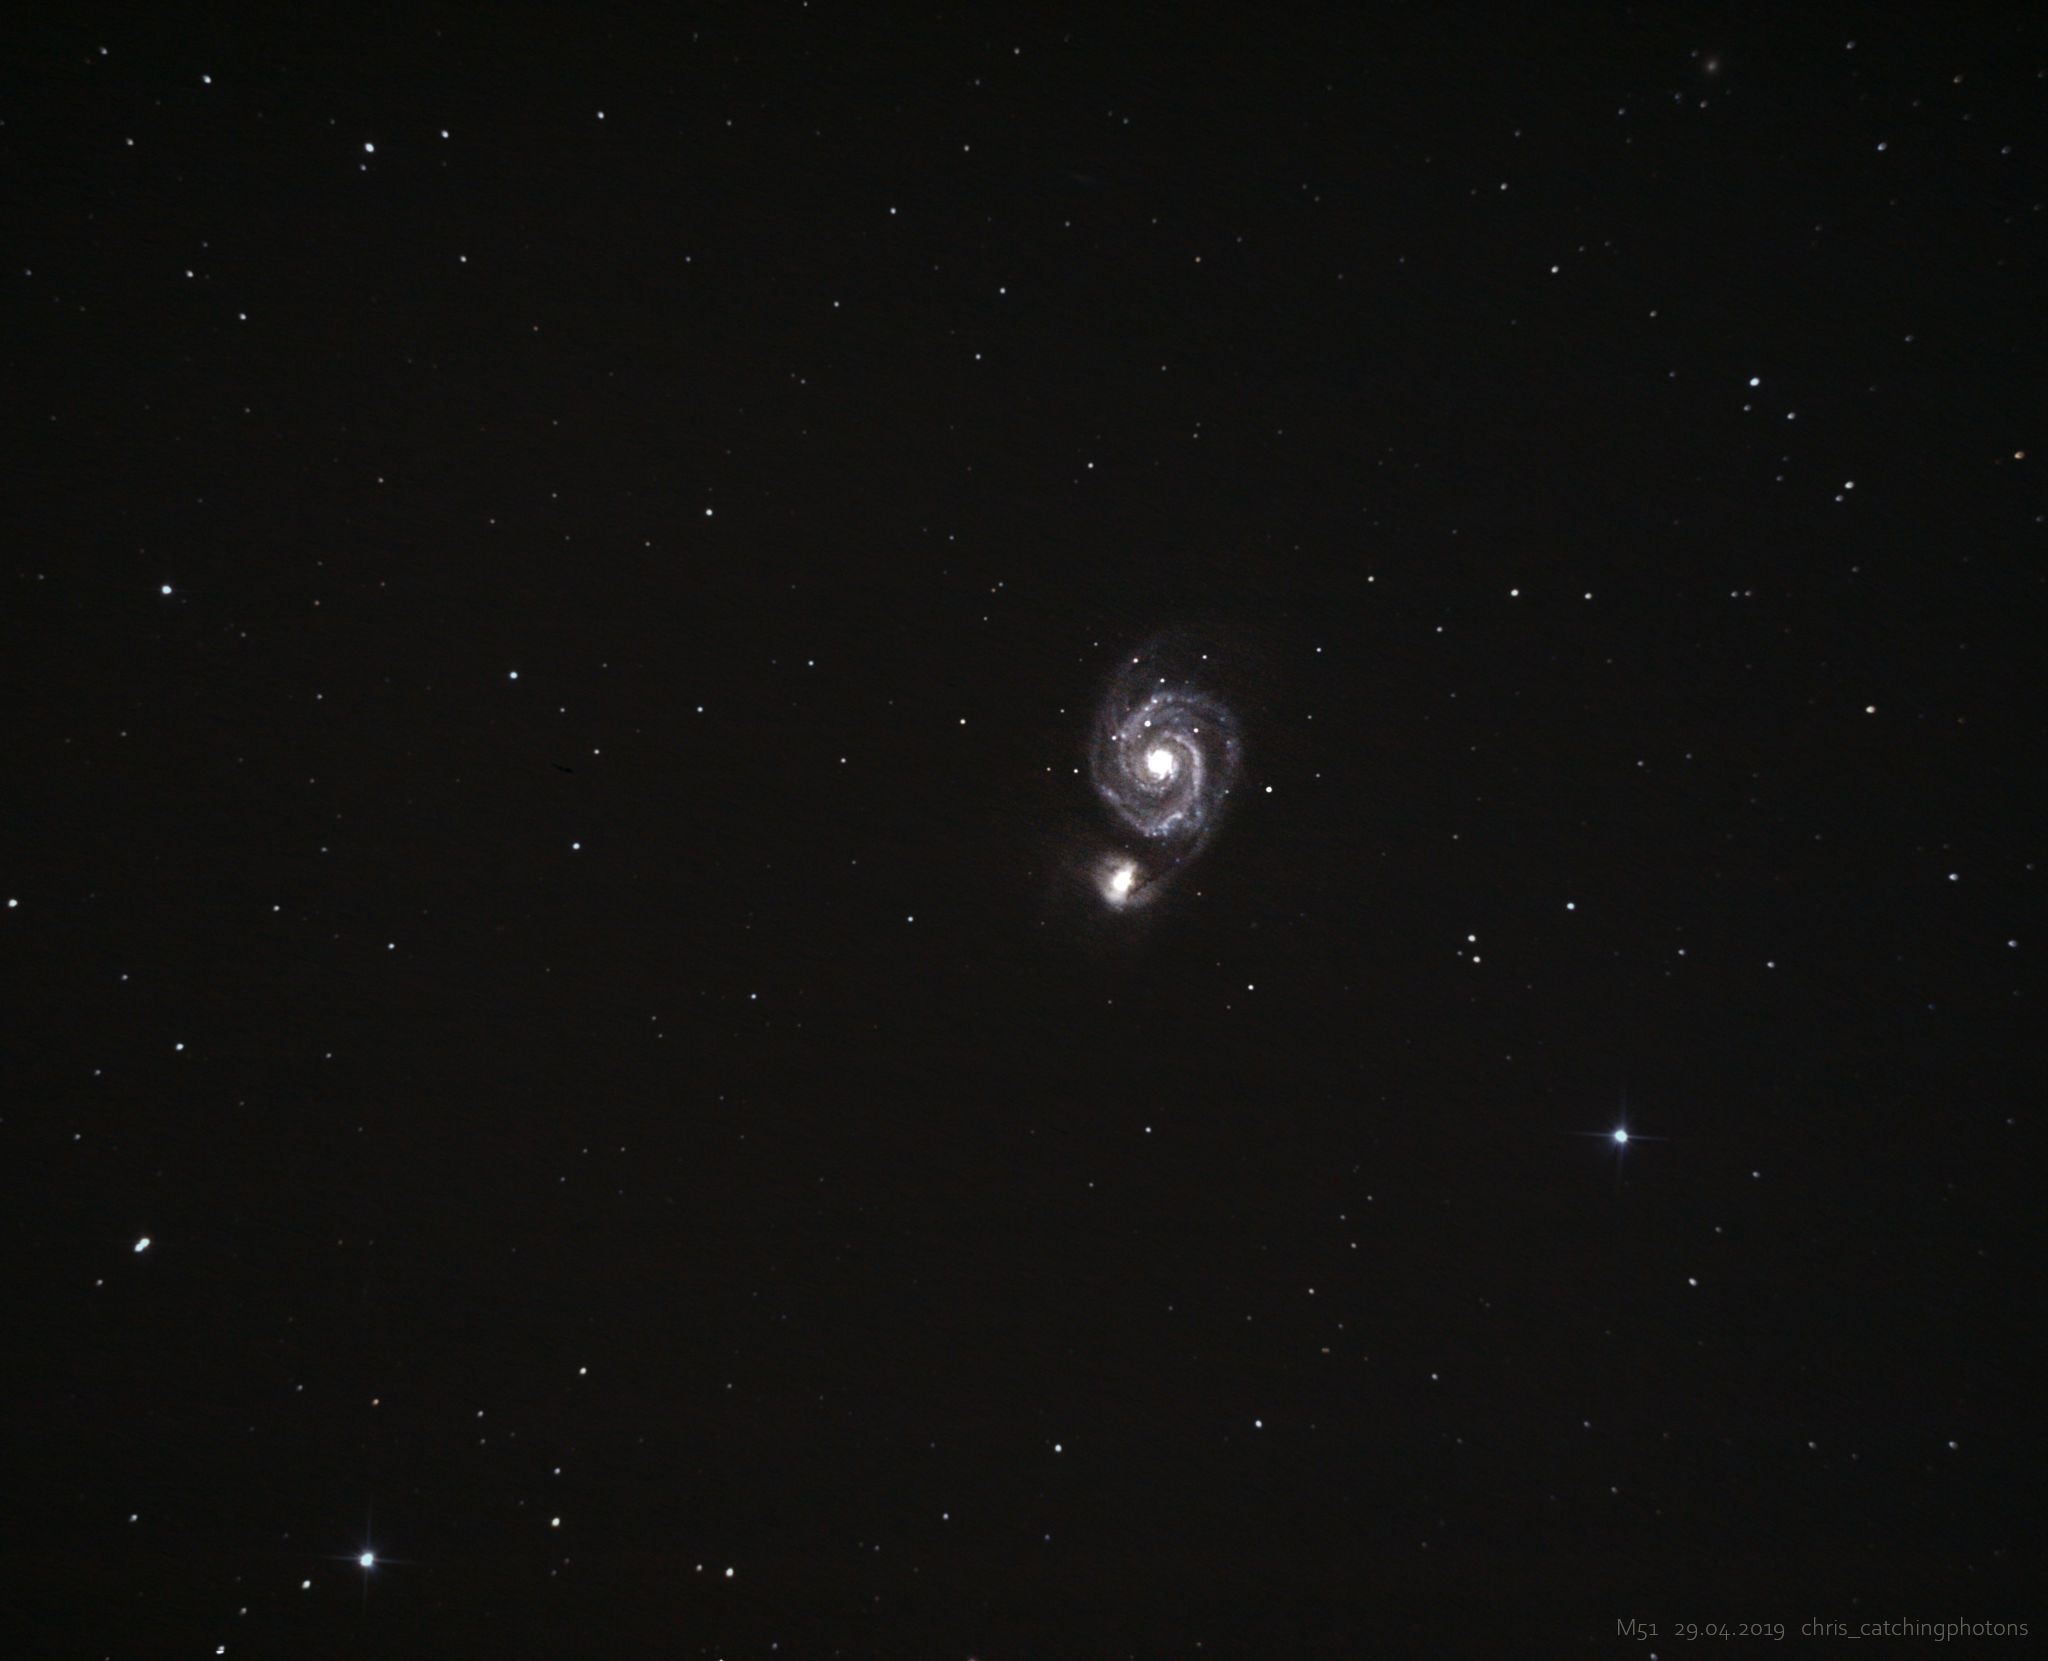
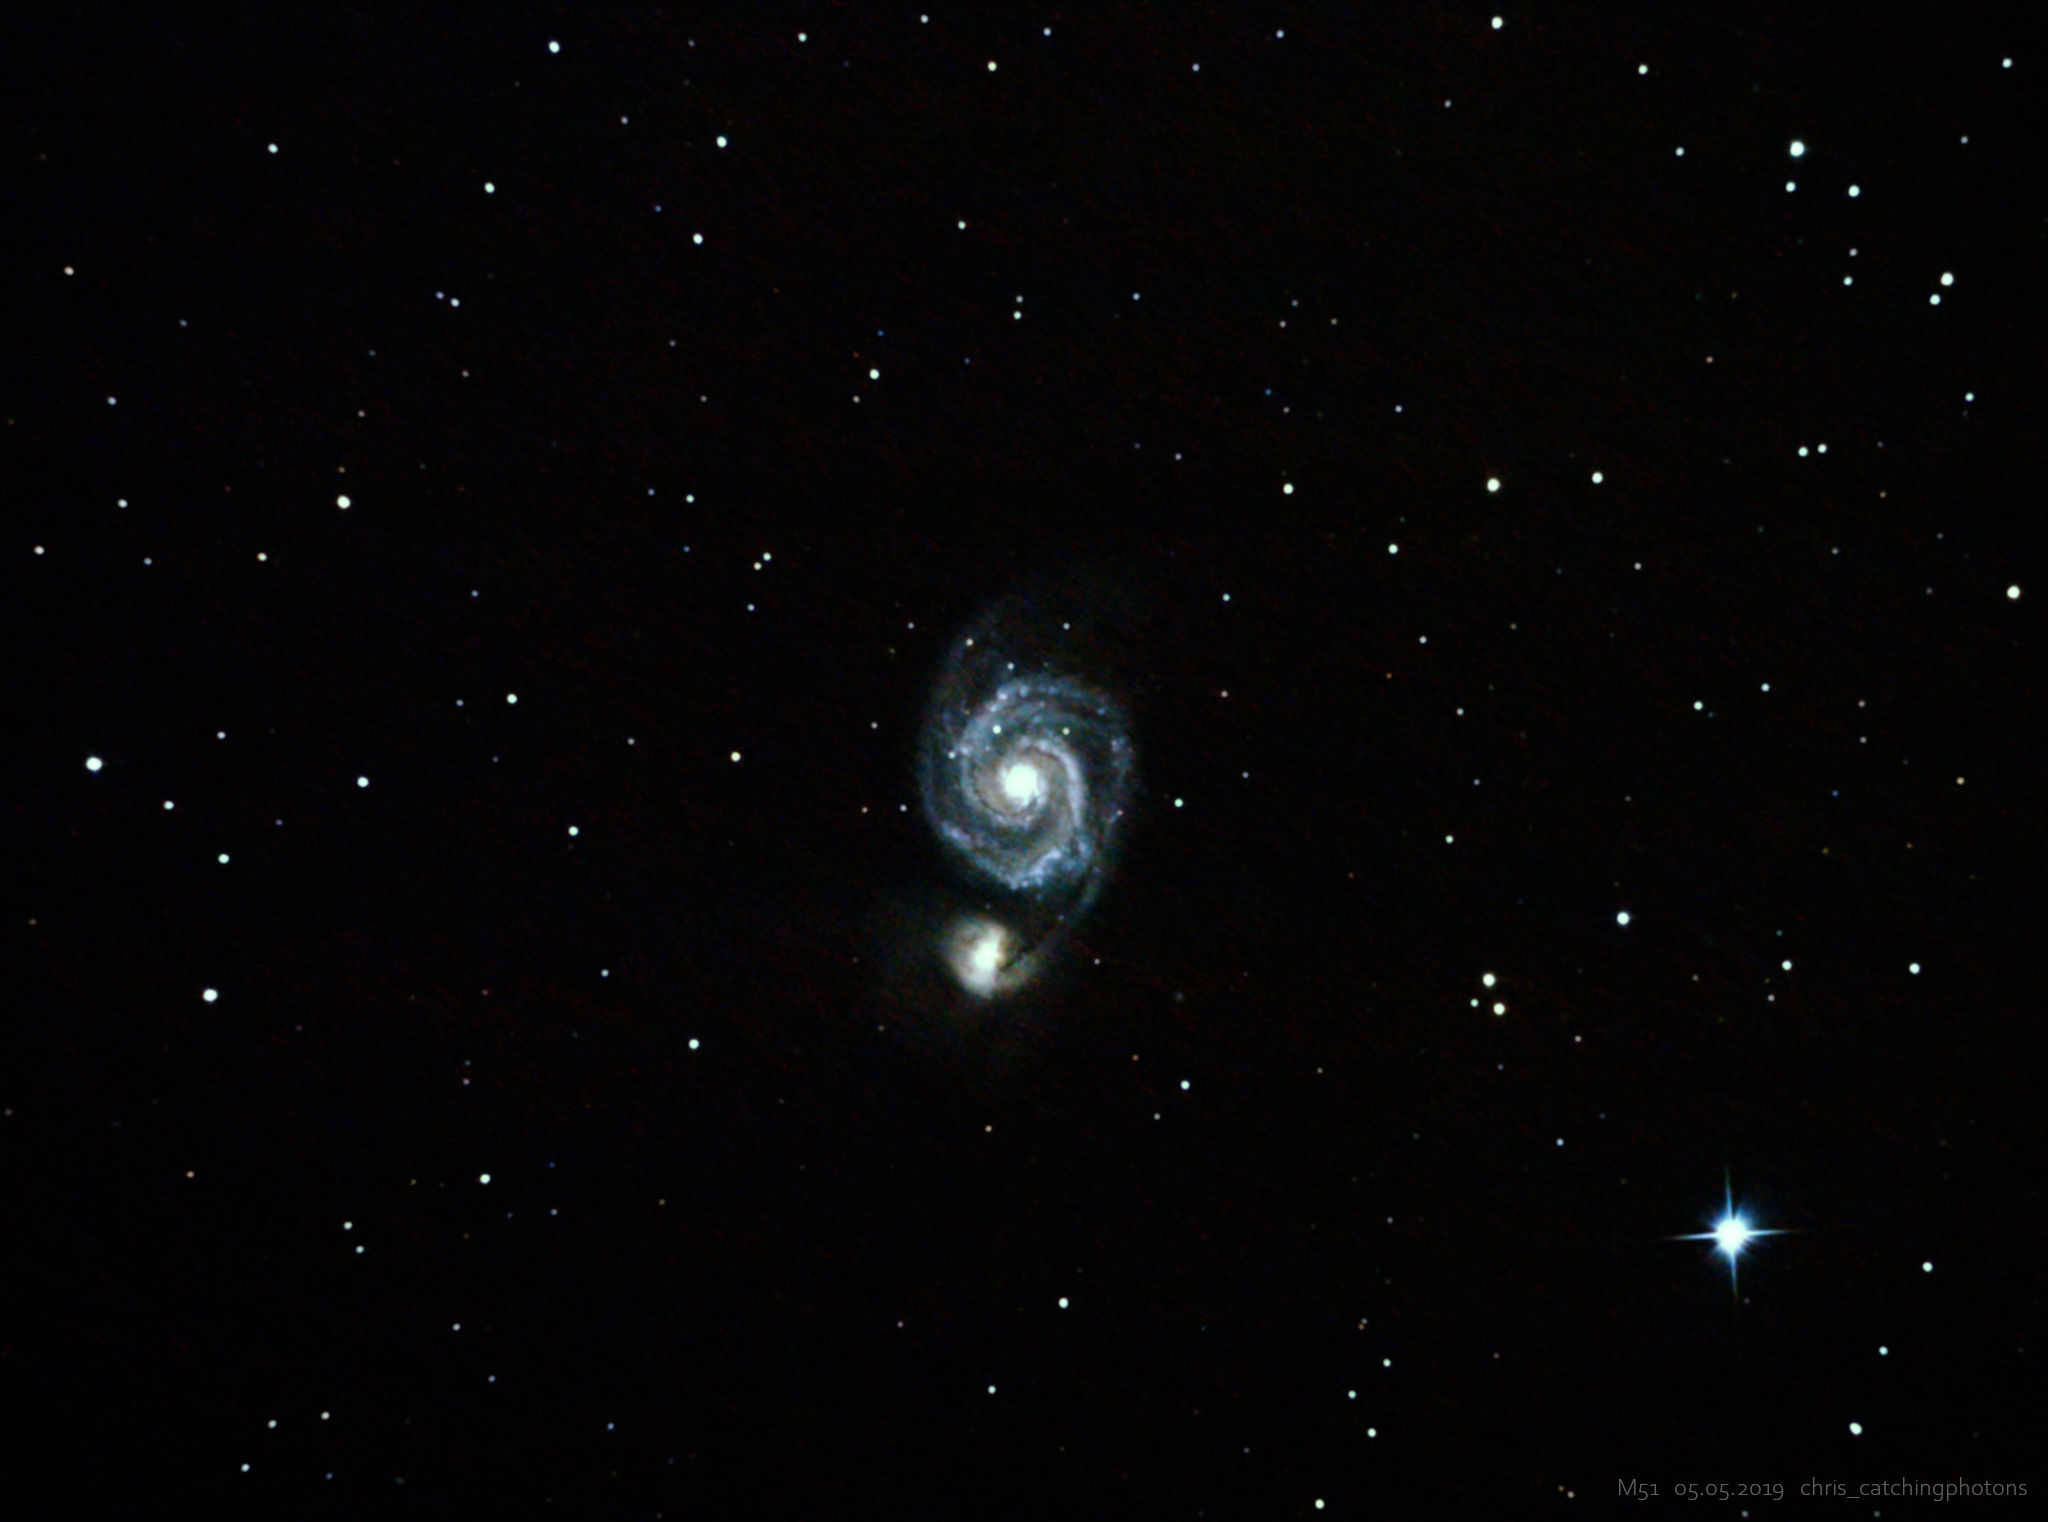
M51 – The Whirlpool Galaxy
This is a very bright spiral galaxy with a smaller companion. „It lies in the constellation Canes Venatici, and was the first galaxy to be classified as a spiral galaxy.[9] Its distance is estimated to be 23 million light-years away from Earth.“ (Wiki)
Because M51 is so bright I chose it to be my first auto-guiding target. This decision was not really „wise“. If you want to create a first light image, you would normally go for a star rich area to see if they are pinpoint at the end. But whatever: I liked M51 right from the beginning.

First image and guiding issues
After polar- and star-alignment, finding the target (easy! It’s so bright!) and framing it I went for 120s subs! Imagine my excitement! The longest subs I was able to produce till this point had been 60 seconds at max! So I was very (!) excited – given the result on the back of my camera.
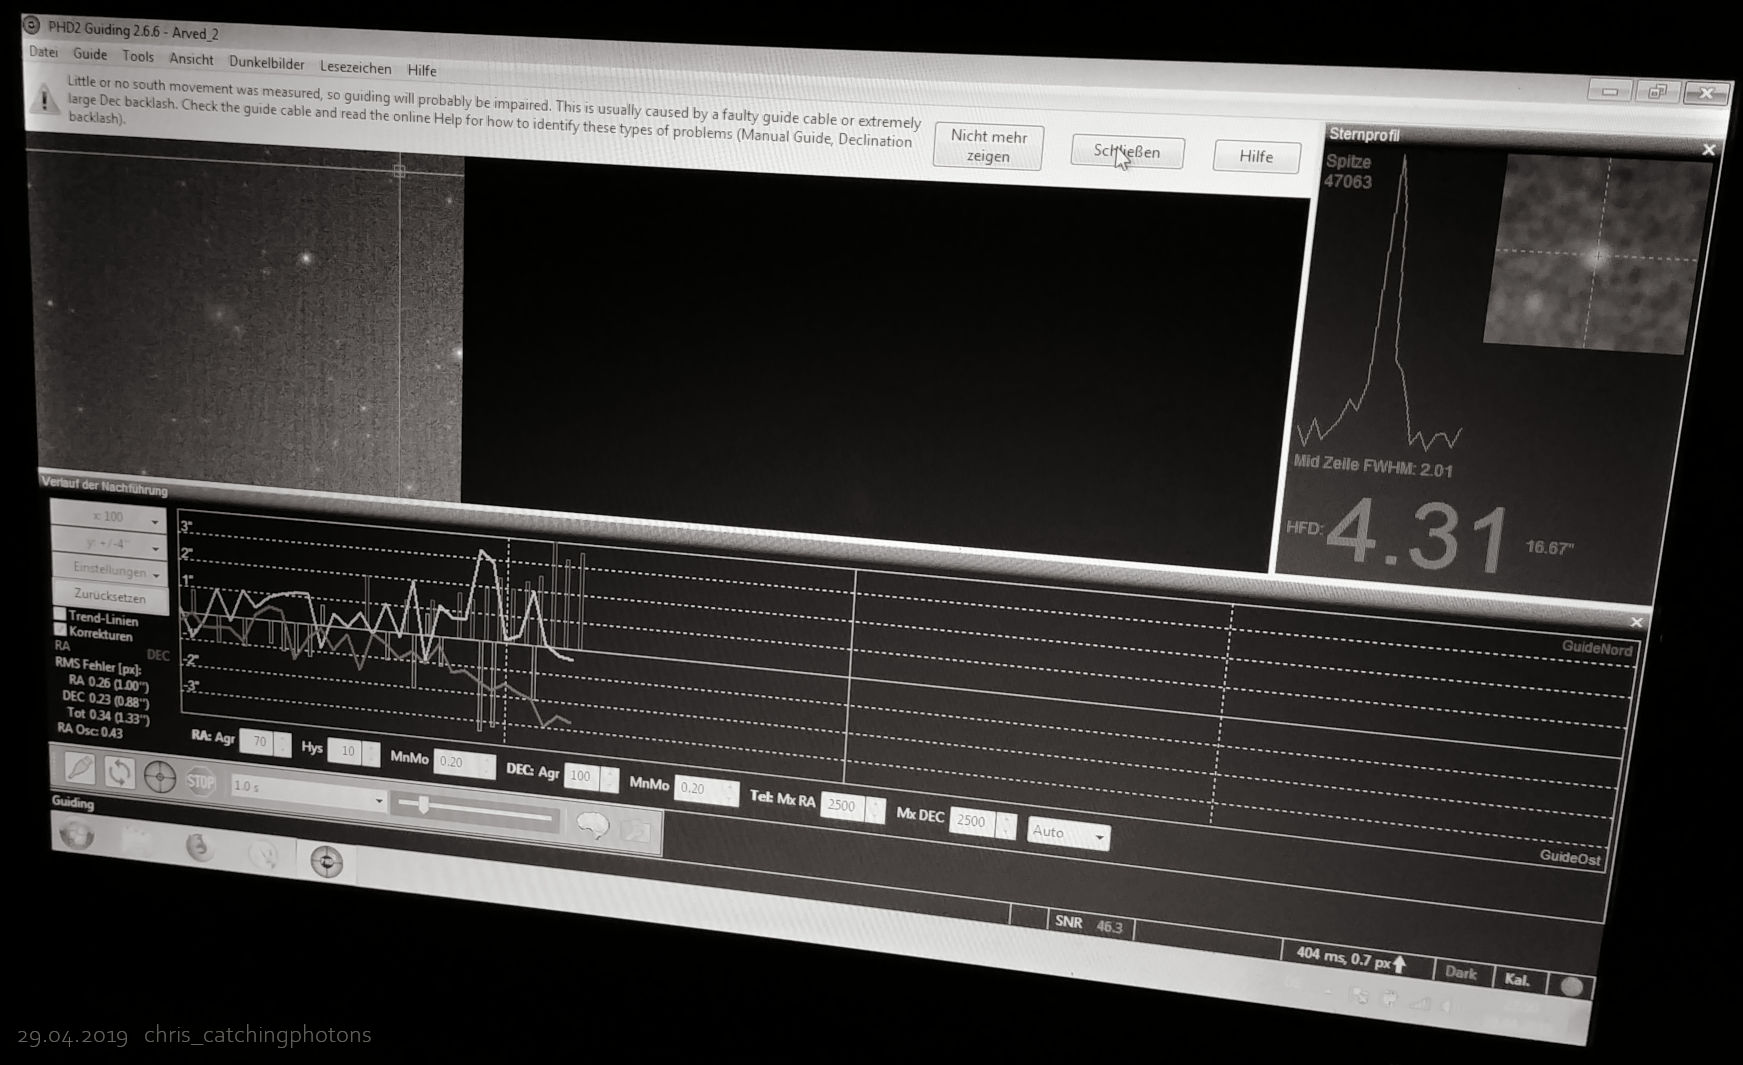
I went with ISO1400 (details in the galaxy were visible in single subs) and started the night. Right away I saw, that PHD2 was acting a bit strange. After the initial calibration steps it displayed that the backlash in DEC. I thinks that this was the first sign of my mount being overloaded with the scope, the guidecam, guidescope, camera and everything else. Here are the messages and the guiding curve with the big error corrections and over-corrections (red) in DEC.
guiding error? trying dither 
guiding error? trying dither
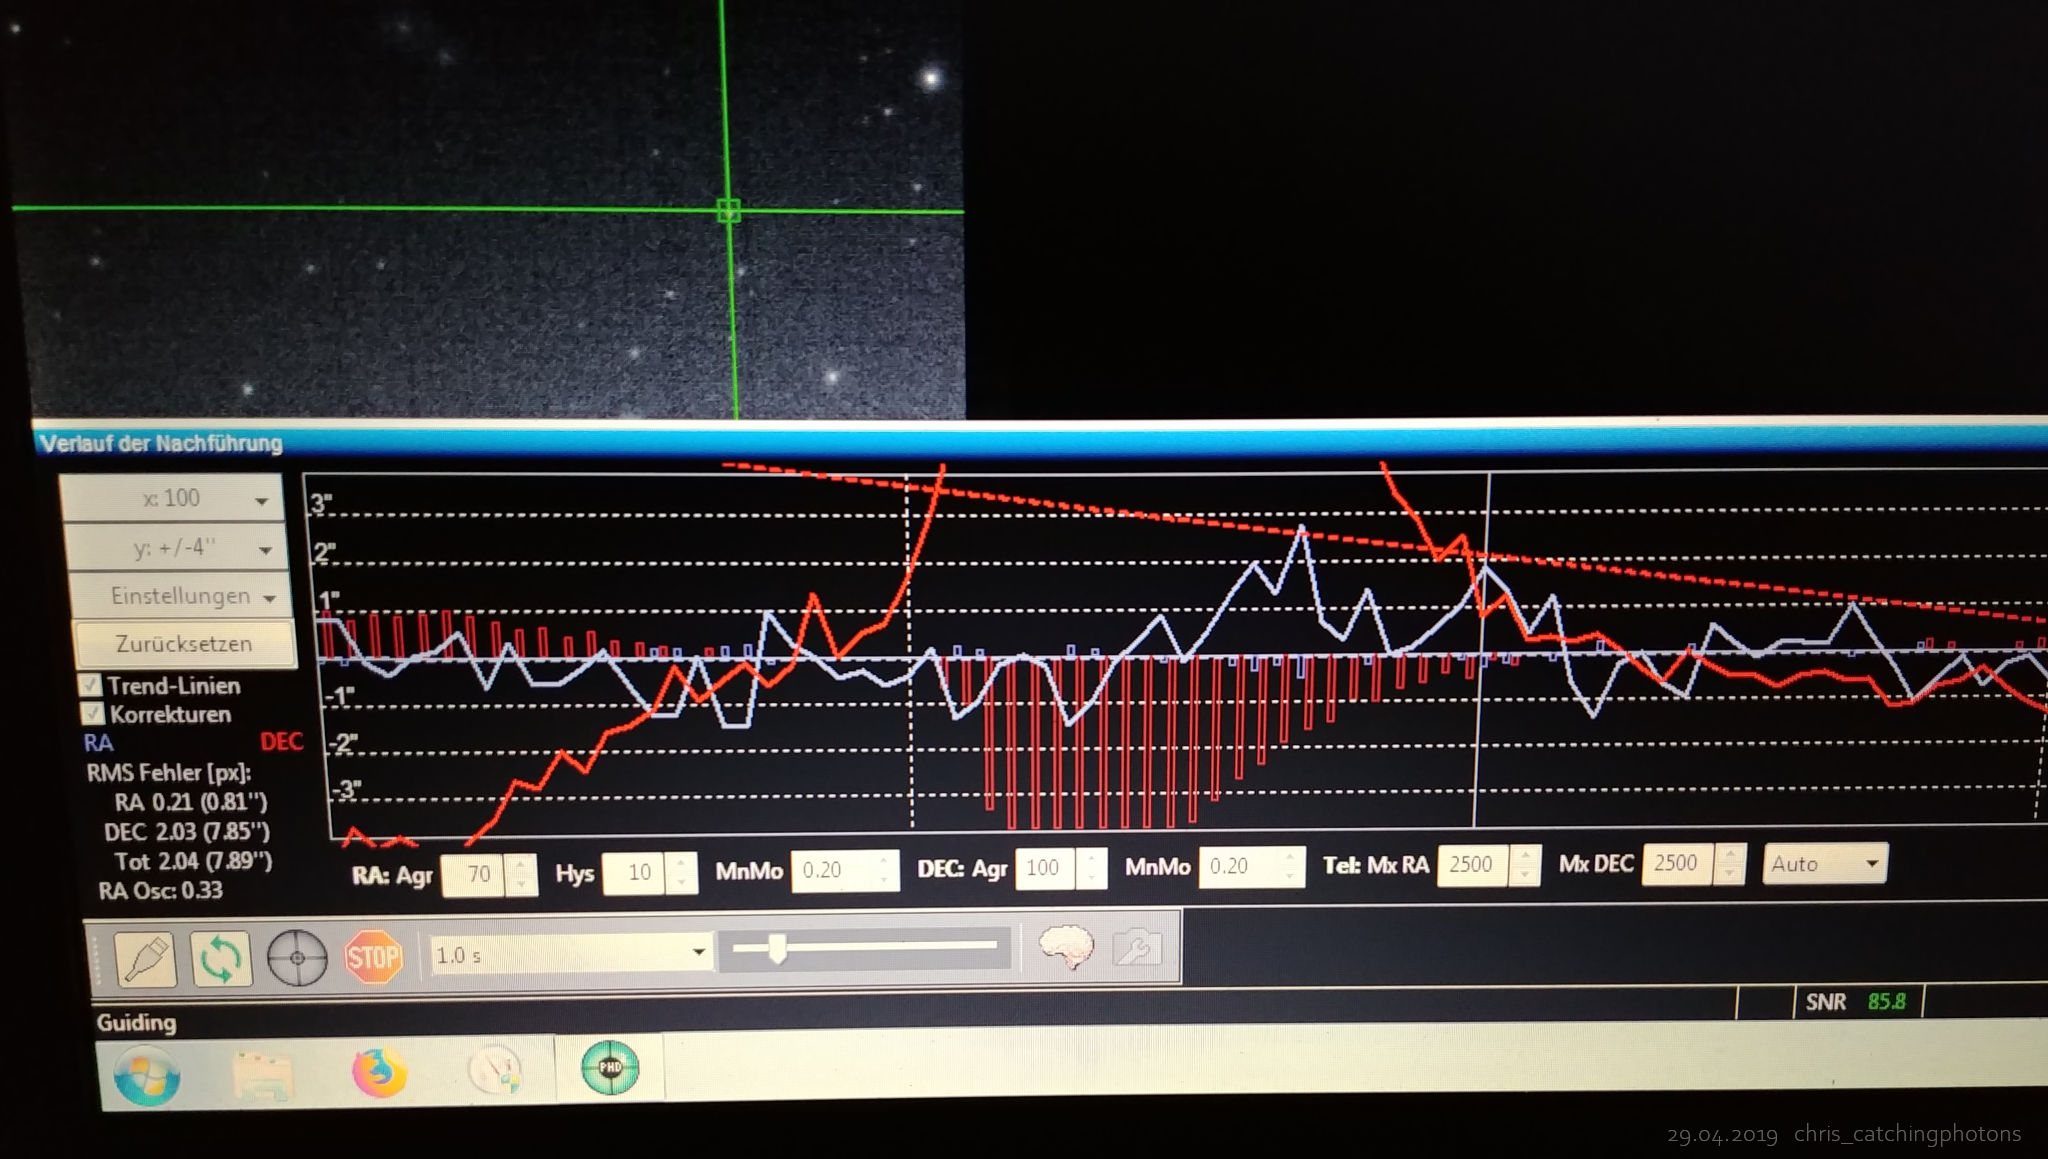
I tried to manually dither in PHD2, too. But that was of no success. After clicking the „manual dither“-button, the PHD2 graph showed massive spices and wouldn’t recover from that for minutes to pass.
Either way: The stars on the single subs of M51 looked round and pin point, so I wasn’t sure what to think. In the end: Even if your PHD2 graph looks nasty… If the stars are round you should be ok’ish. So I ended up taking 35x 120sec subs on this target. That is around 70min and afterwards (as always for me) too little time for a proper processing.
Processing & a second night
Processing M51 is kind of similar to processing other galaxies like M31 or M81/82. The structure of the galaxy must be visible – in this case M51 is a „grand design“ spiral galaxy directly seen face on – so the arms, the companion and its fuzzy outer layers, and the core must not burn out. This is always a problem when there are big brightness differences in the image.
Second thing is the „background to foreground“ processing. If you stretch the image as a whole it might easily happen, that the galaxy looks ok’ish but the stars (already bright) totally burn out.
To avoid both aspects I advice you to work with layer-masks in Photoshop/GIMP. Thereby you can stretch just the parts of the image, that needs highlighting.
Two things are visible in the image:
– The overall noisiness
– „structural“ noise – bands of noise running diagonally through the image.
Both aspects ask for more data in your image – that means more total integrated exposure time. I did a full video on this topci:
In short: the more subs you stack, the smoother the overall image quality will be and the less noise you have to manage while stretching the data. For me, that meant: Another night on this beautiful target!
As M51 is such a bright target finding and framing the object is quite an easy thing to do, because you can see the galaxy even in short exposures and you don’t need to spend minutes after minutes waiting for the test exposure to complete. Either way: You should spend some time getting the framing right, because when stacking the image, those parts only visible on one image will be cut out. For M51: Just keep it centered in all frames and don’t touch the camera orientation. That’s fairly simple.

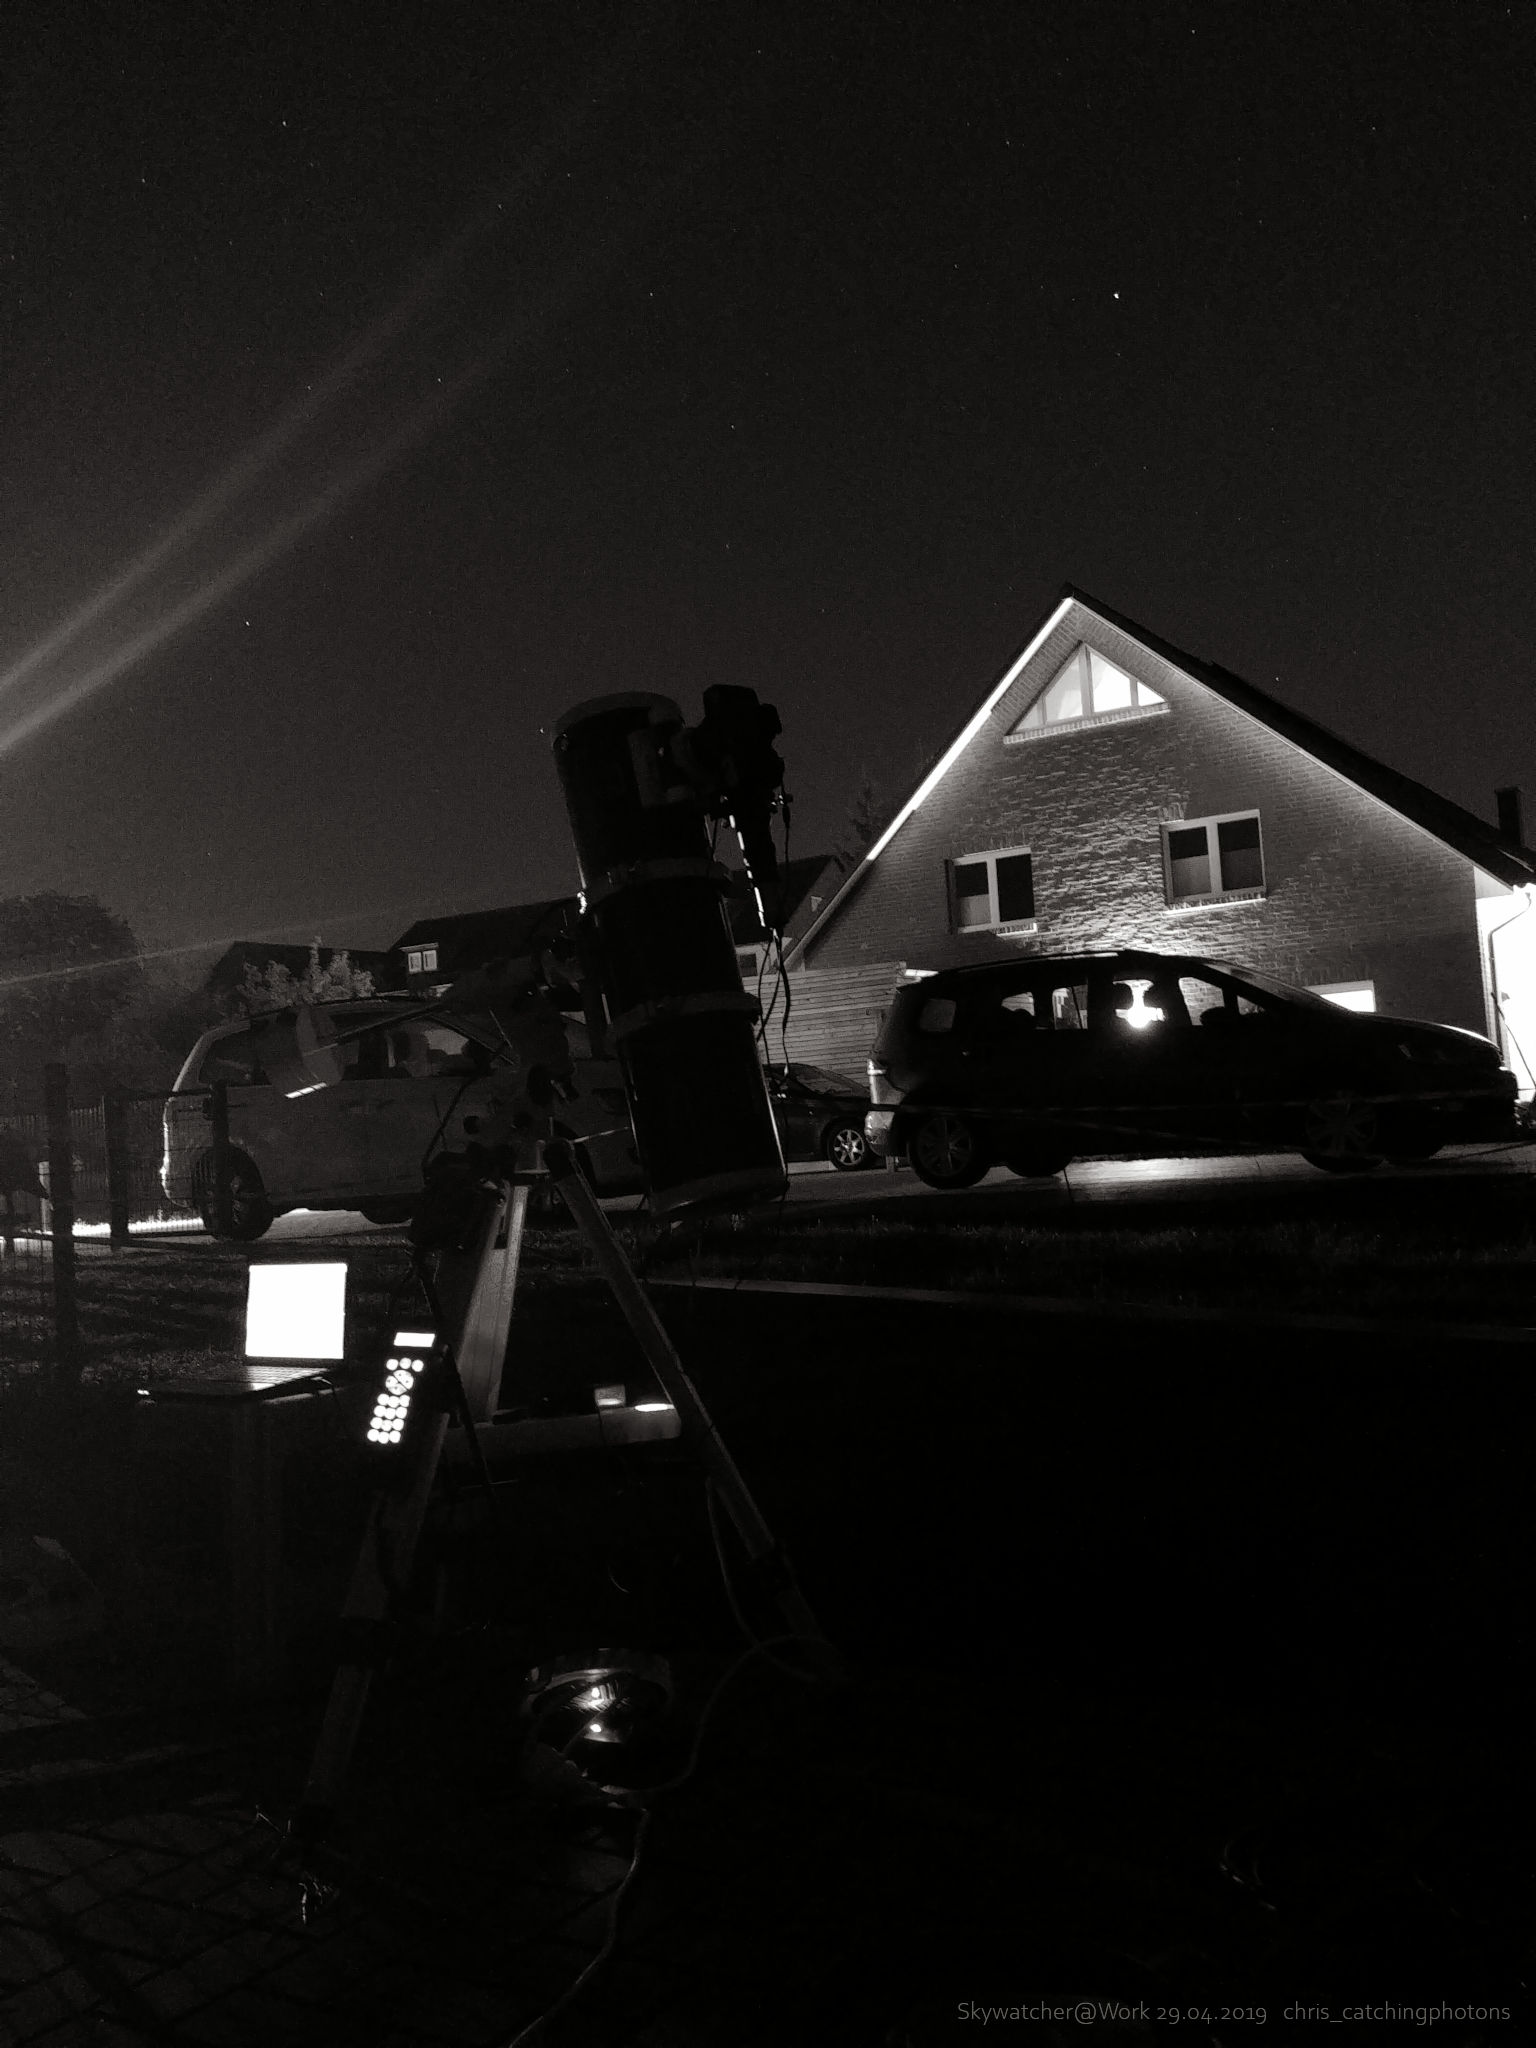
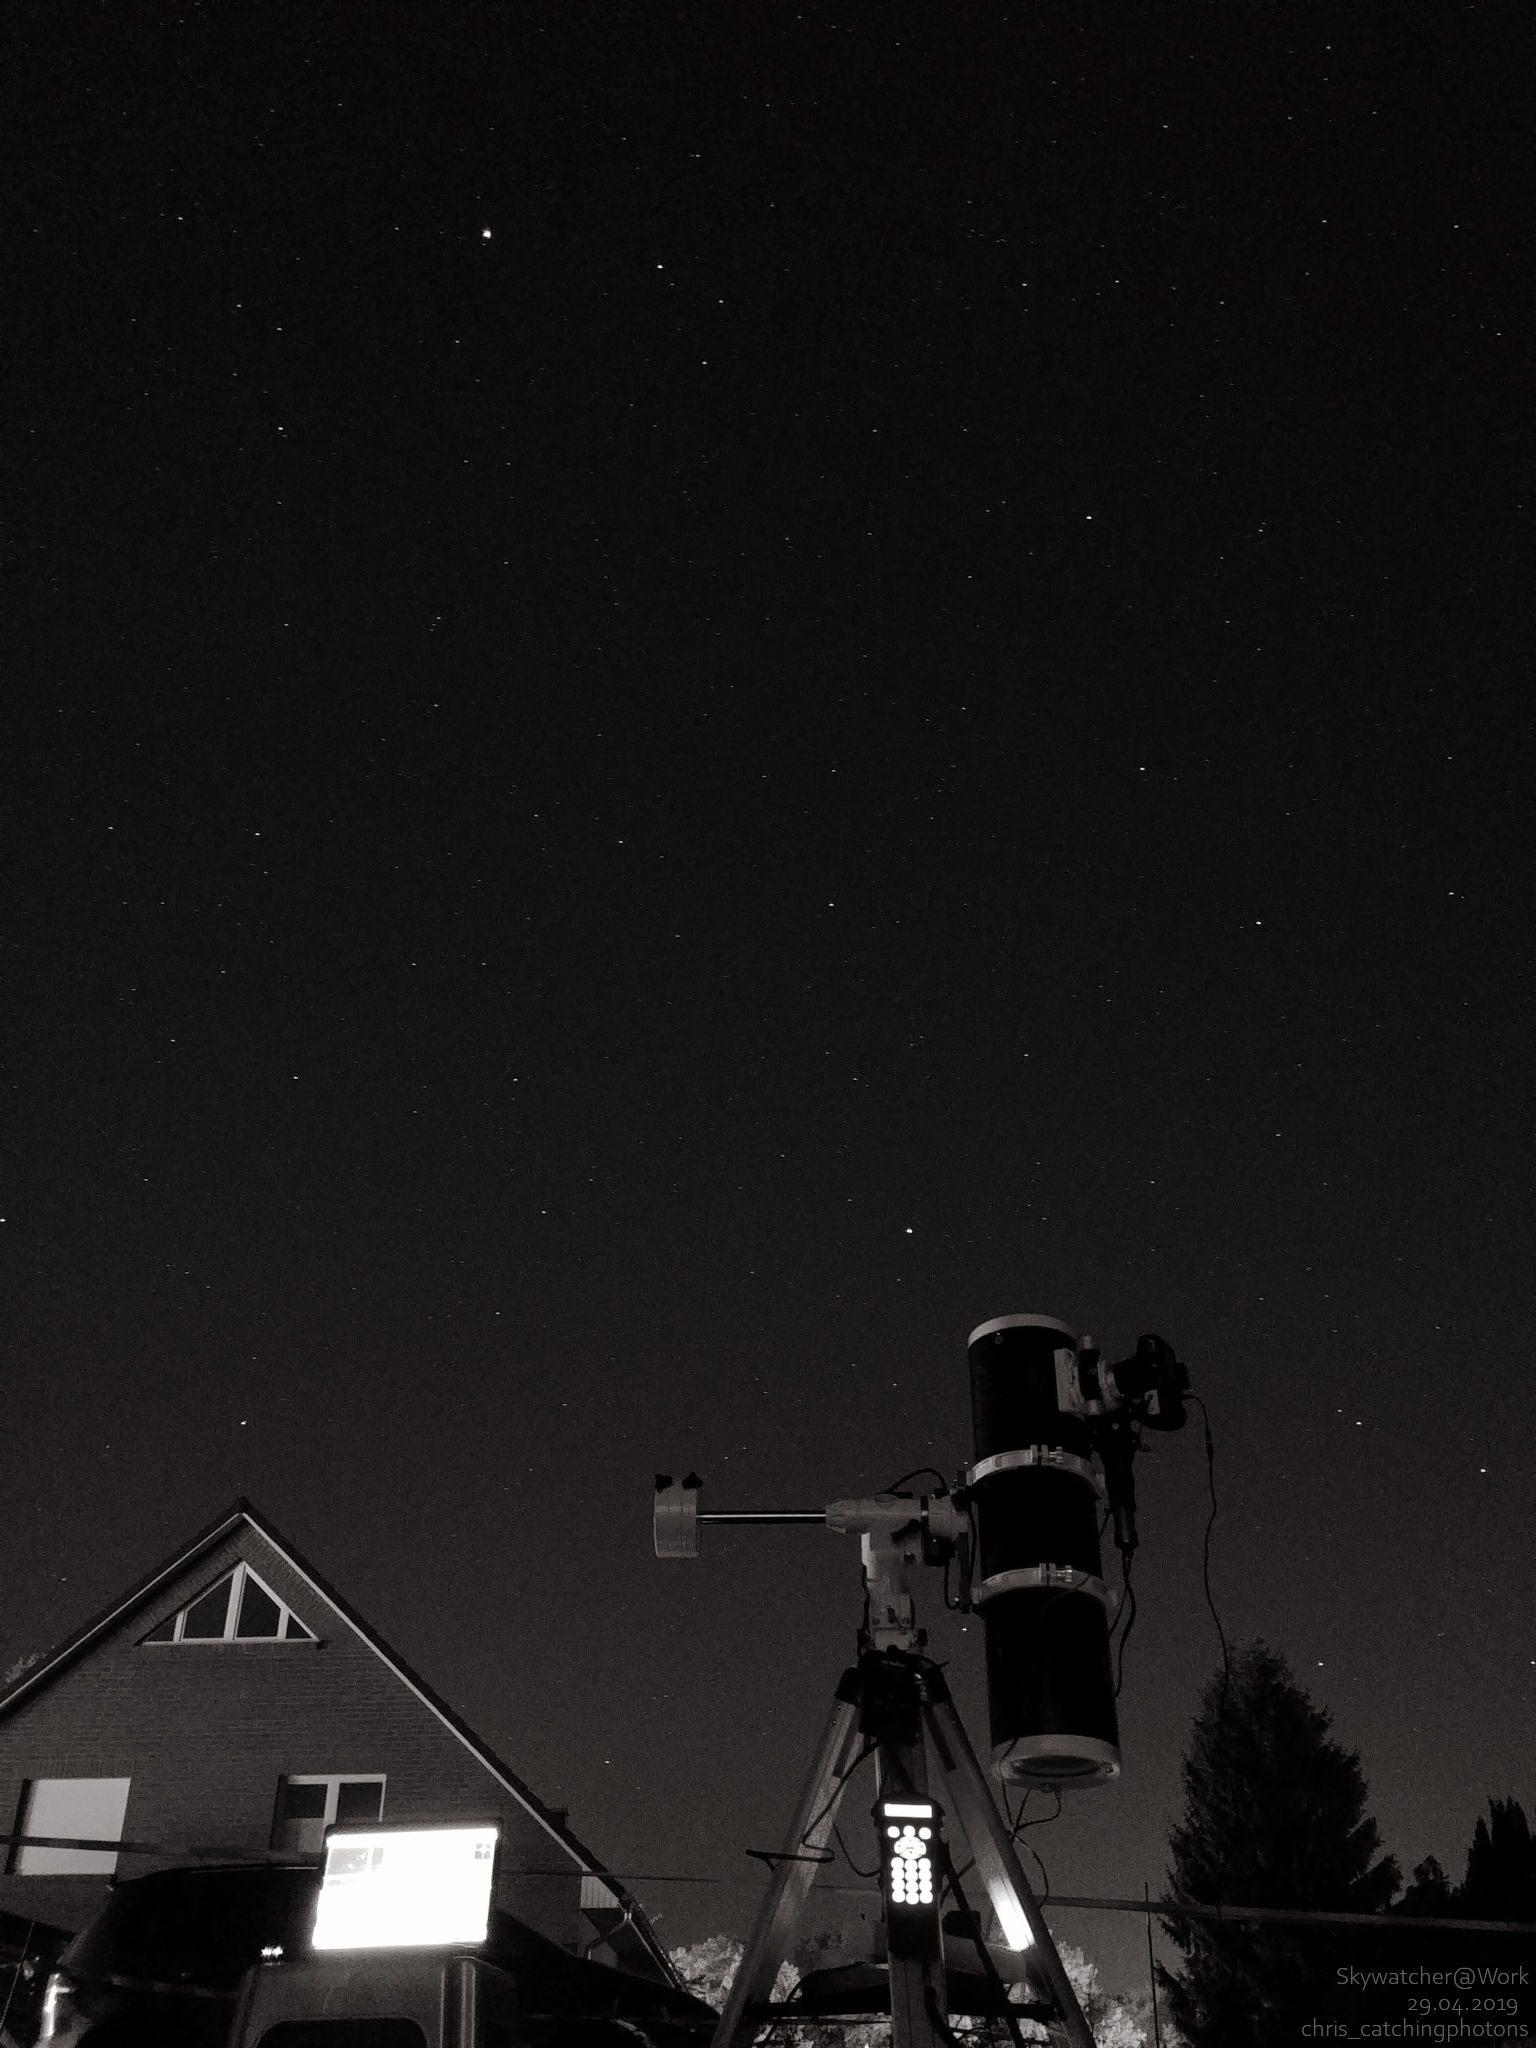
Skywatcher @ Work and light pollution 
Skywatcher @ Work
The result
In the end I got three images:
- One from the first night. The colors are a bit „shy“ and you can clearly see the overall noisiness. The total integrated exposure time is 35x 120″ subs = around 70min. ISO with the Olympus E510 was @ 1400.
- The second one is „second night only“. The exposure time is around two hours and the noise level was significantly reduced. The colors start to appear.
- The third image is the integration of both nights. The finer details start to appear and the structure is much more sharp.
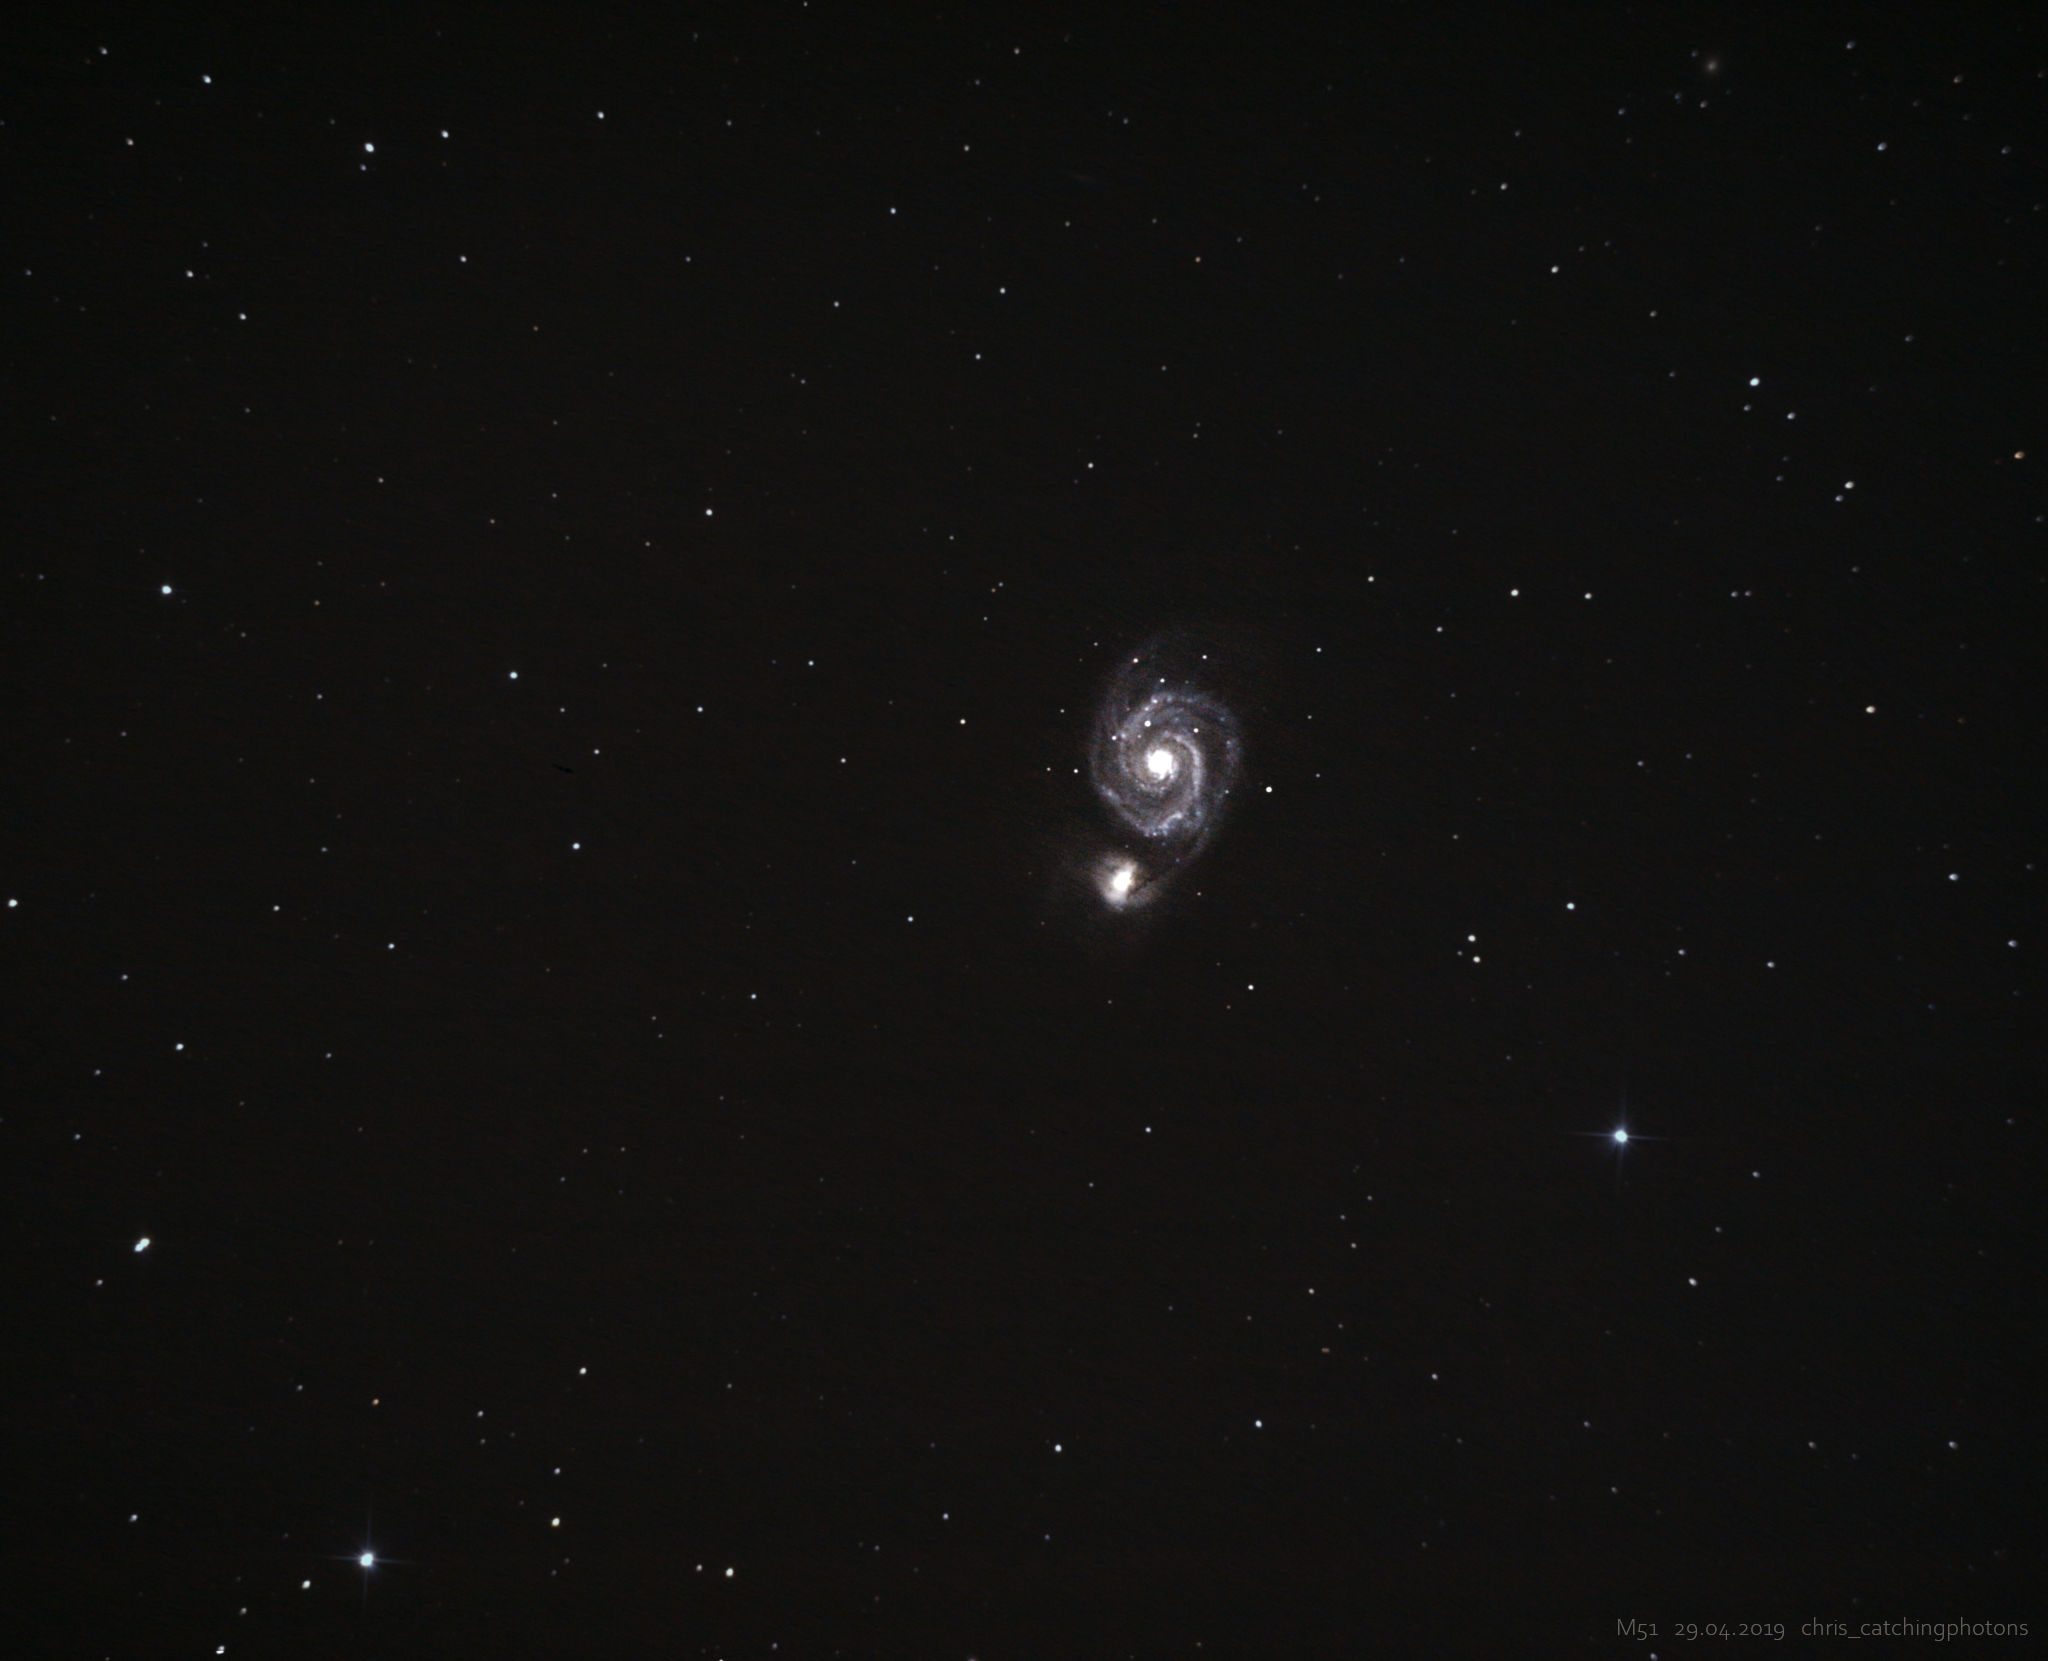
M51 – 70min integration time: 35x 120sec Sub @ ISO1400 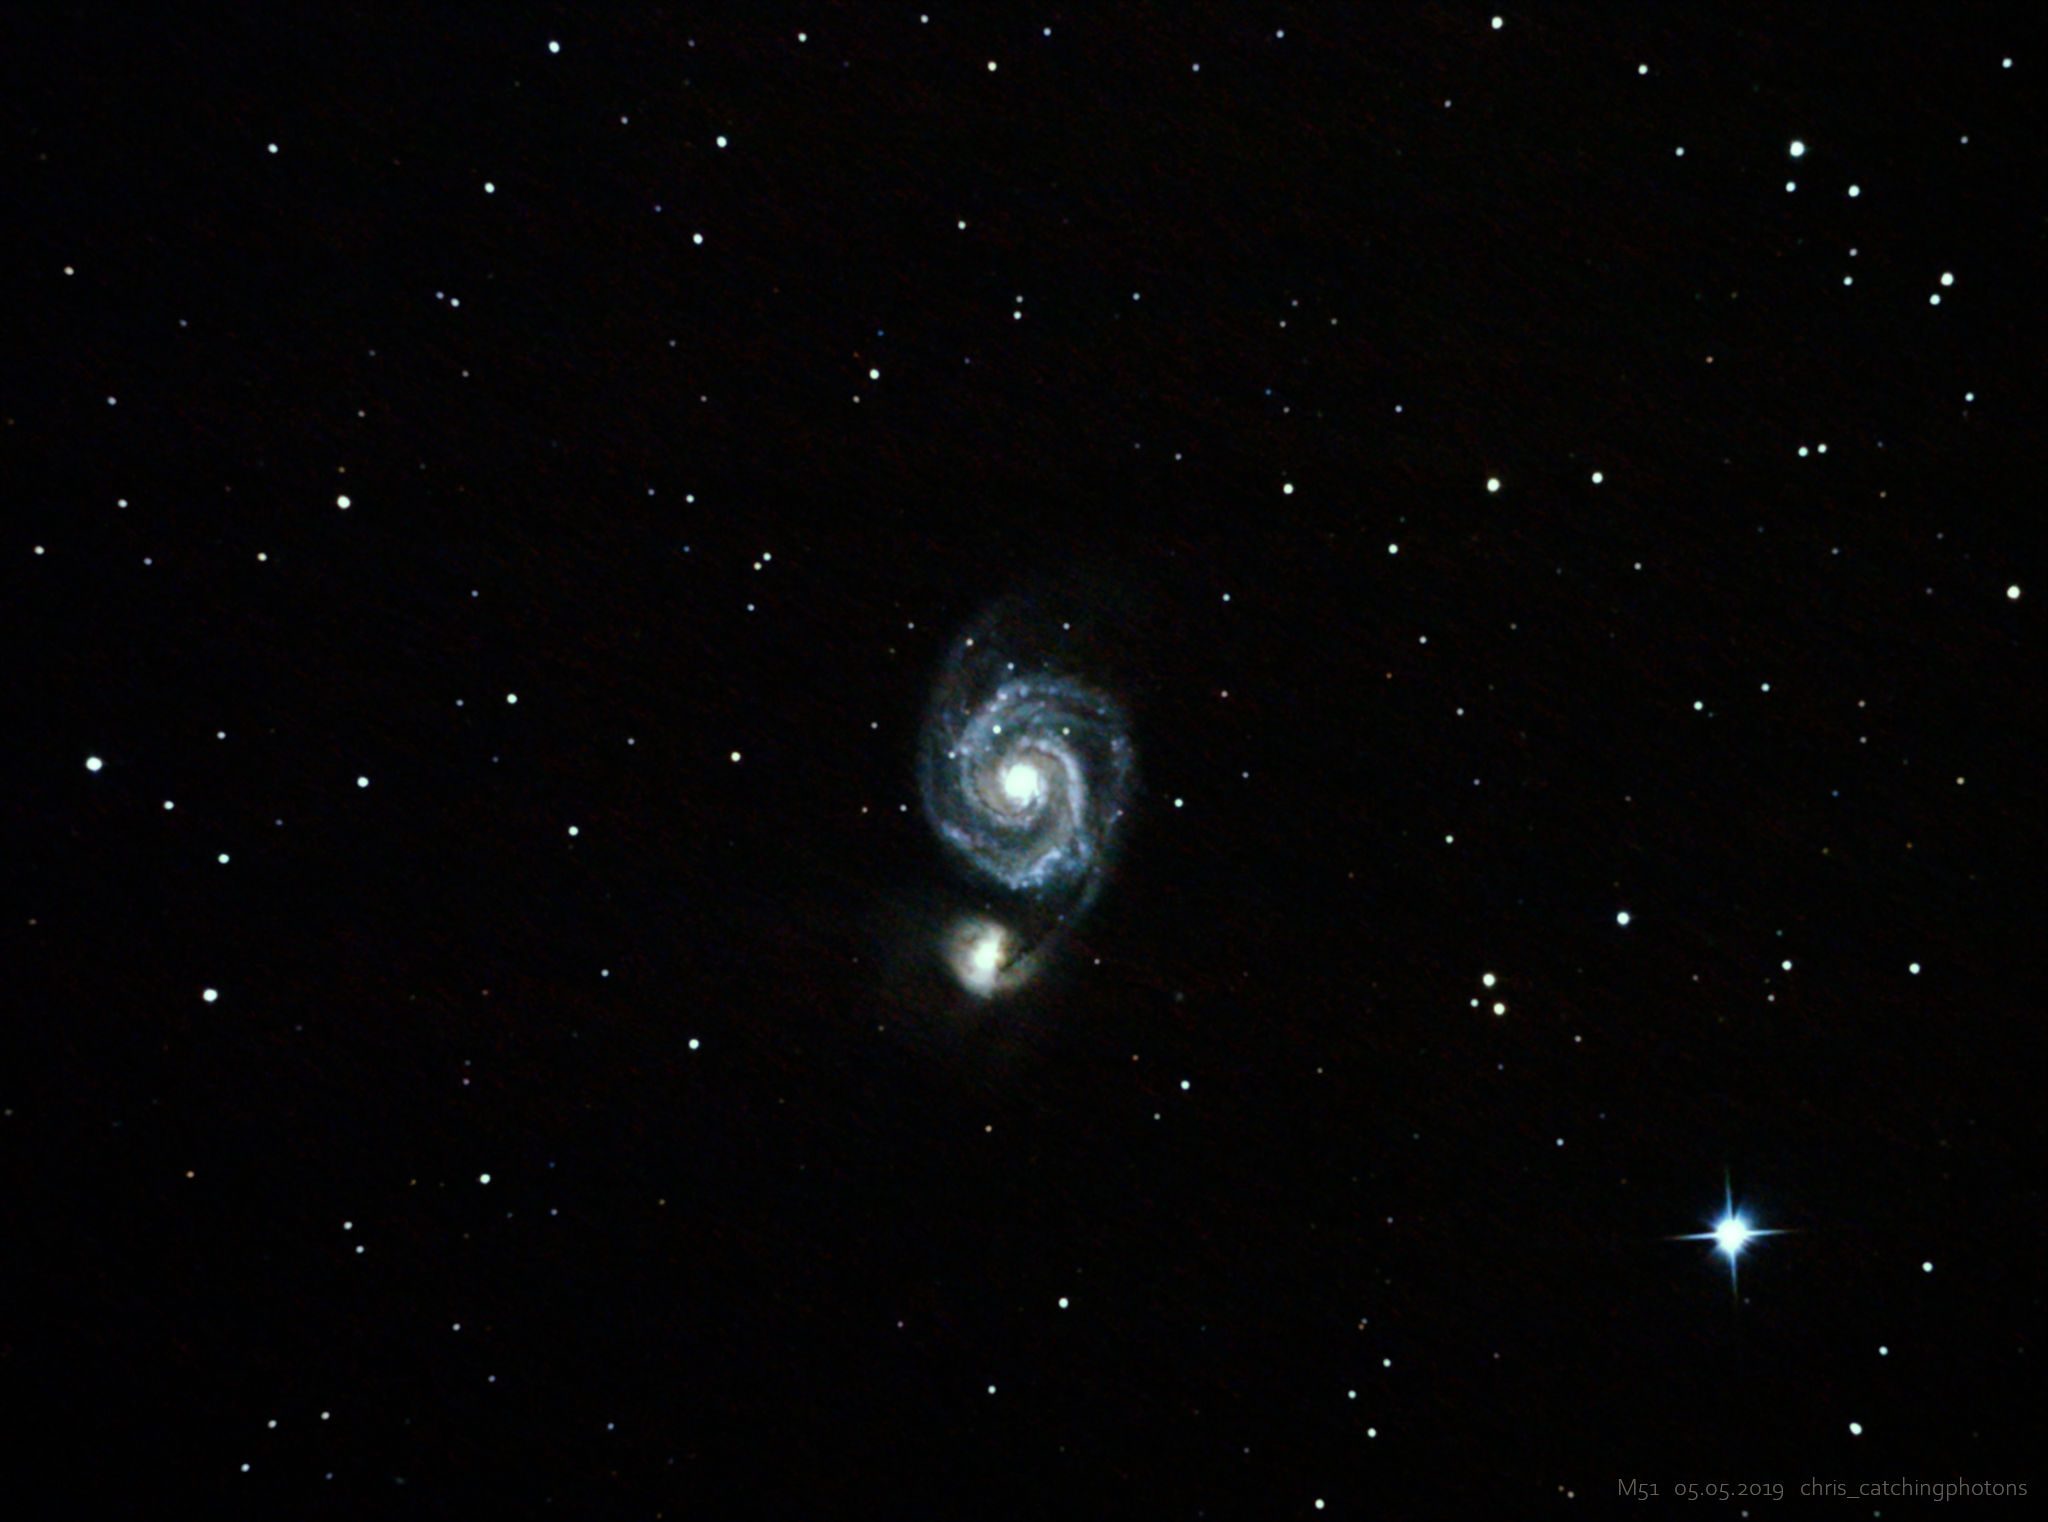
M51 – 2h: 120sec Sub @ ISO1400 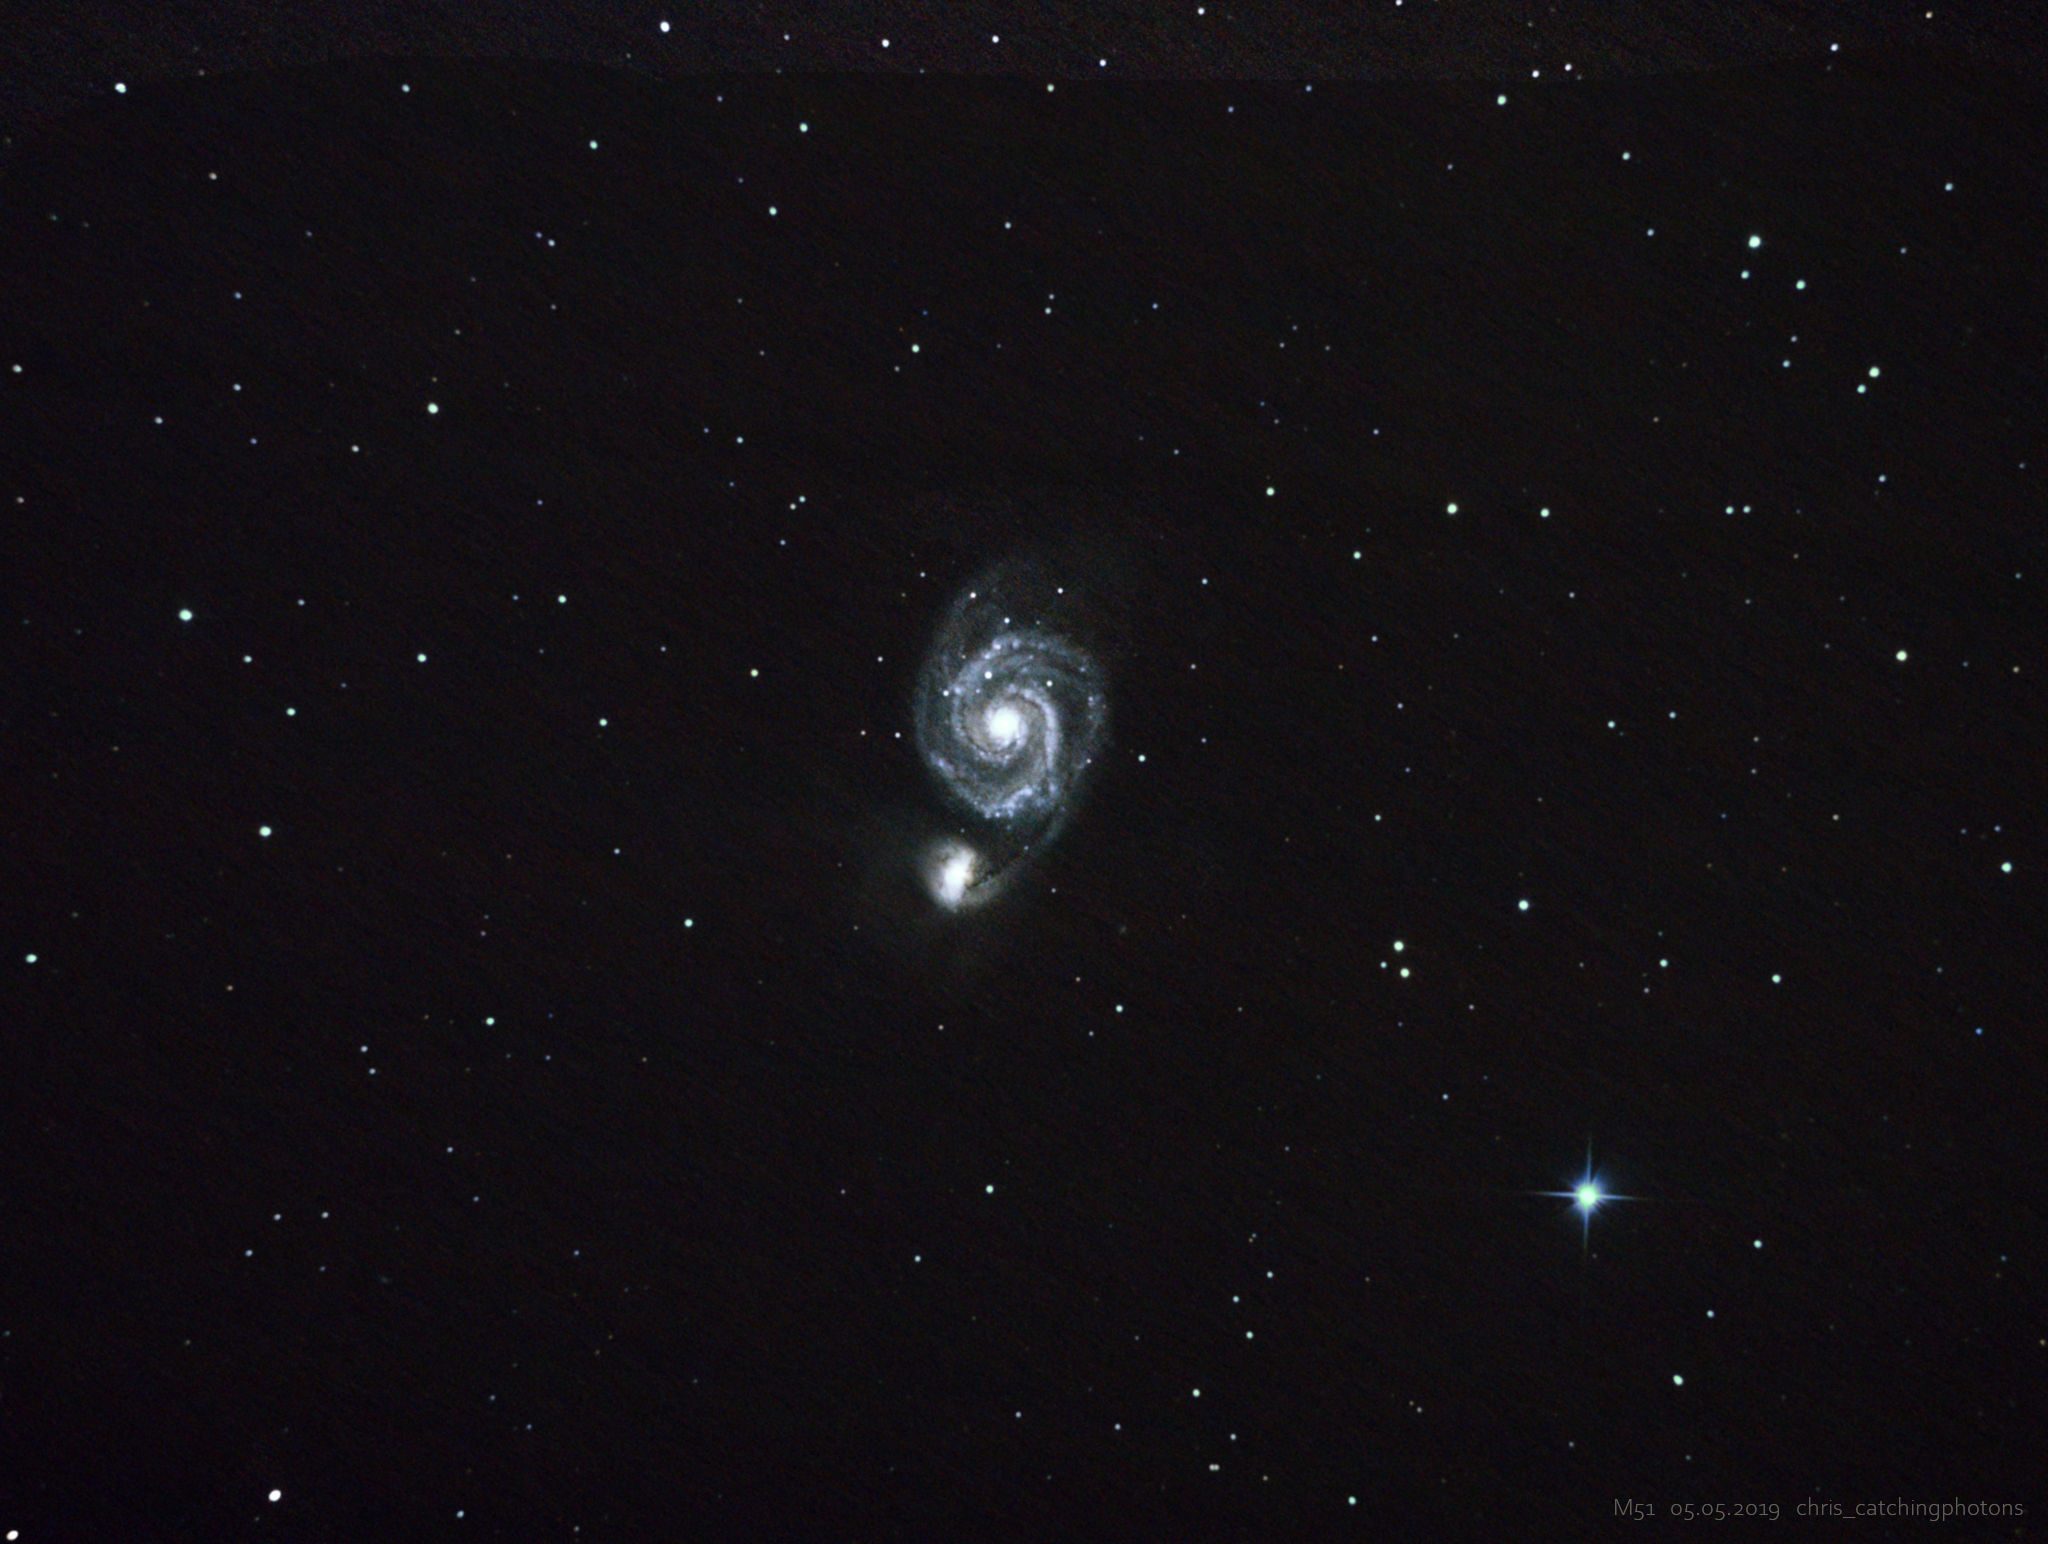
M51 – 3h: 120sec Sub @ ISO1400
To be fair: The three images might have been treated slightly different. In the final version I was used to stretch the data for this particular target with my particular camera for quite some tries… But either way: You can clearly see the differences!
BUT: You can also see the rolling noise in the background. Even with guiding and PHD2 turned on: The images shift from exposure to exposure. So presumably polar alignment was slightly off (maybe) or the capabilities of the mount were reached (for sure!).
Conclusion:
Targets need their time. Google images of that target in beforehand to see what factors are important for this particular target. For me: The outer gas layers of the small companion galaxy might have been slightly „fluffy’er“ and the overall background noise level needs to be reduced once more. Also: There is a stacking artifact at the upper border of the image. I don’t know what caused this, it looks like mismatch in framing or something.
But nevertheless: I really like this image, taken with the old DSLR and the EQ3-Pro mount at its weight limit. Guiding worked for 120″ subs and my wasted exposure time due to bad subs were drastically (!) reduced! That meas: A happy photographer and more useful exposure time!
I wish you clear skies!
Greetings
Chris