05.12.2018

New aspect: Revisiting a target to improve quality and seeking for the next
Image acquisition:
Venus: This was a shot in hurry. On morning the 5th of December I set up the scope in a hurry to capture Venus. Polar alignment, balancing: All quick and dirty because of the limited amount of time. The result was a hard job to even find Venus with the scope and the attached webcam. After finding Venus I struggled with the right driver-settings. Venus was so incredible bright that even focussing was a nightmare. The bad polar alignment made I just worse. Venus, taken with a 3x barlow, hurried to leave the FOV whenever I thought that I got the settings right. Then I needed to reslew and start all over again. I managed to capture one video file with a very unstable Venus and an unclear focus.
M31 Andromeda Galaxy: Since the first DSLR image I wanted to return to Andromeda Galaxy. I did that on October the 11th but missed focus back then. So next time and next try! The temperature was down to zero degree Celsius and I managed to frame Andromeda right in the middle using some 60 second test frames with ISO 1600. I set the Galaxy from corner to corner diagonally in the image to capture as much of the object as possible. My FOV is just so small to capture it as a whole. I started with 60’ subs on ISO 400 mimicking the last settings. After an hour of exposure I turned to the next target.
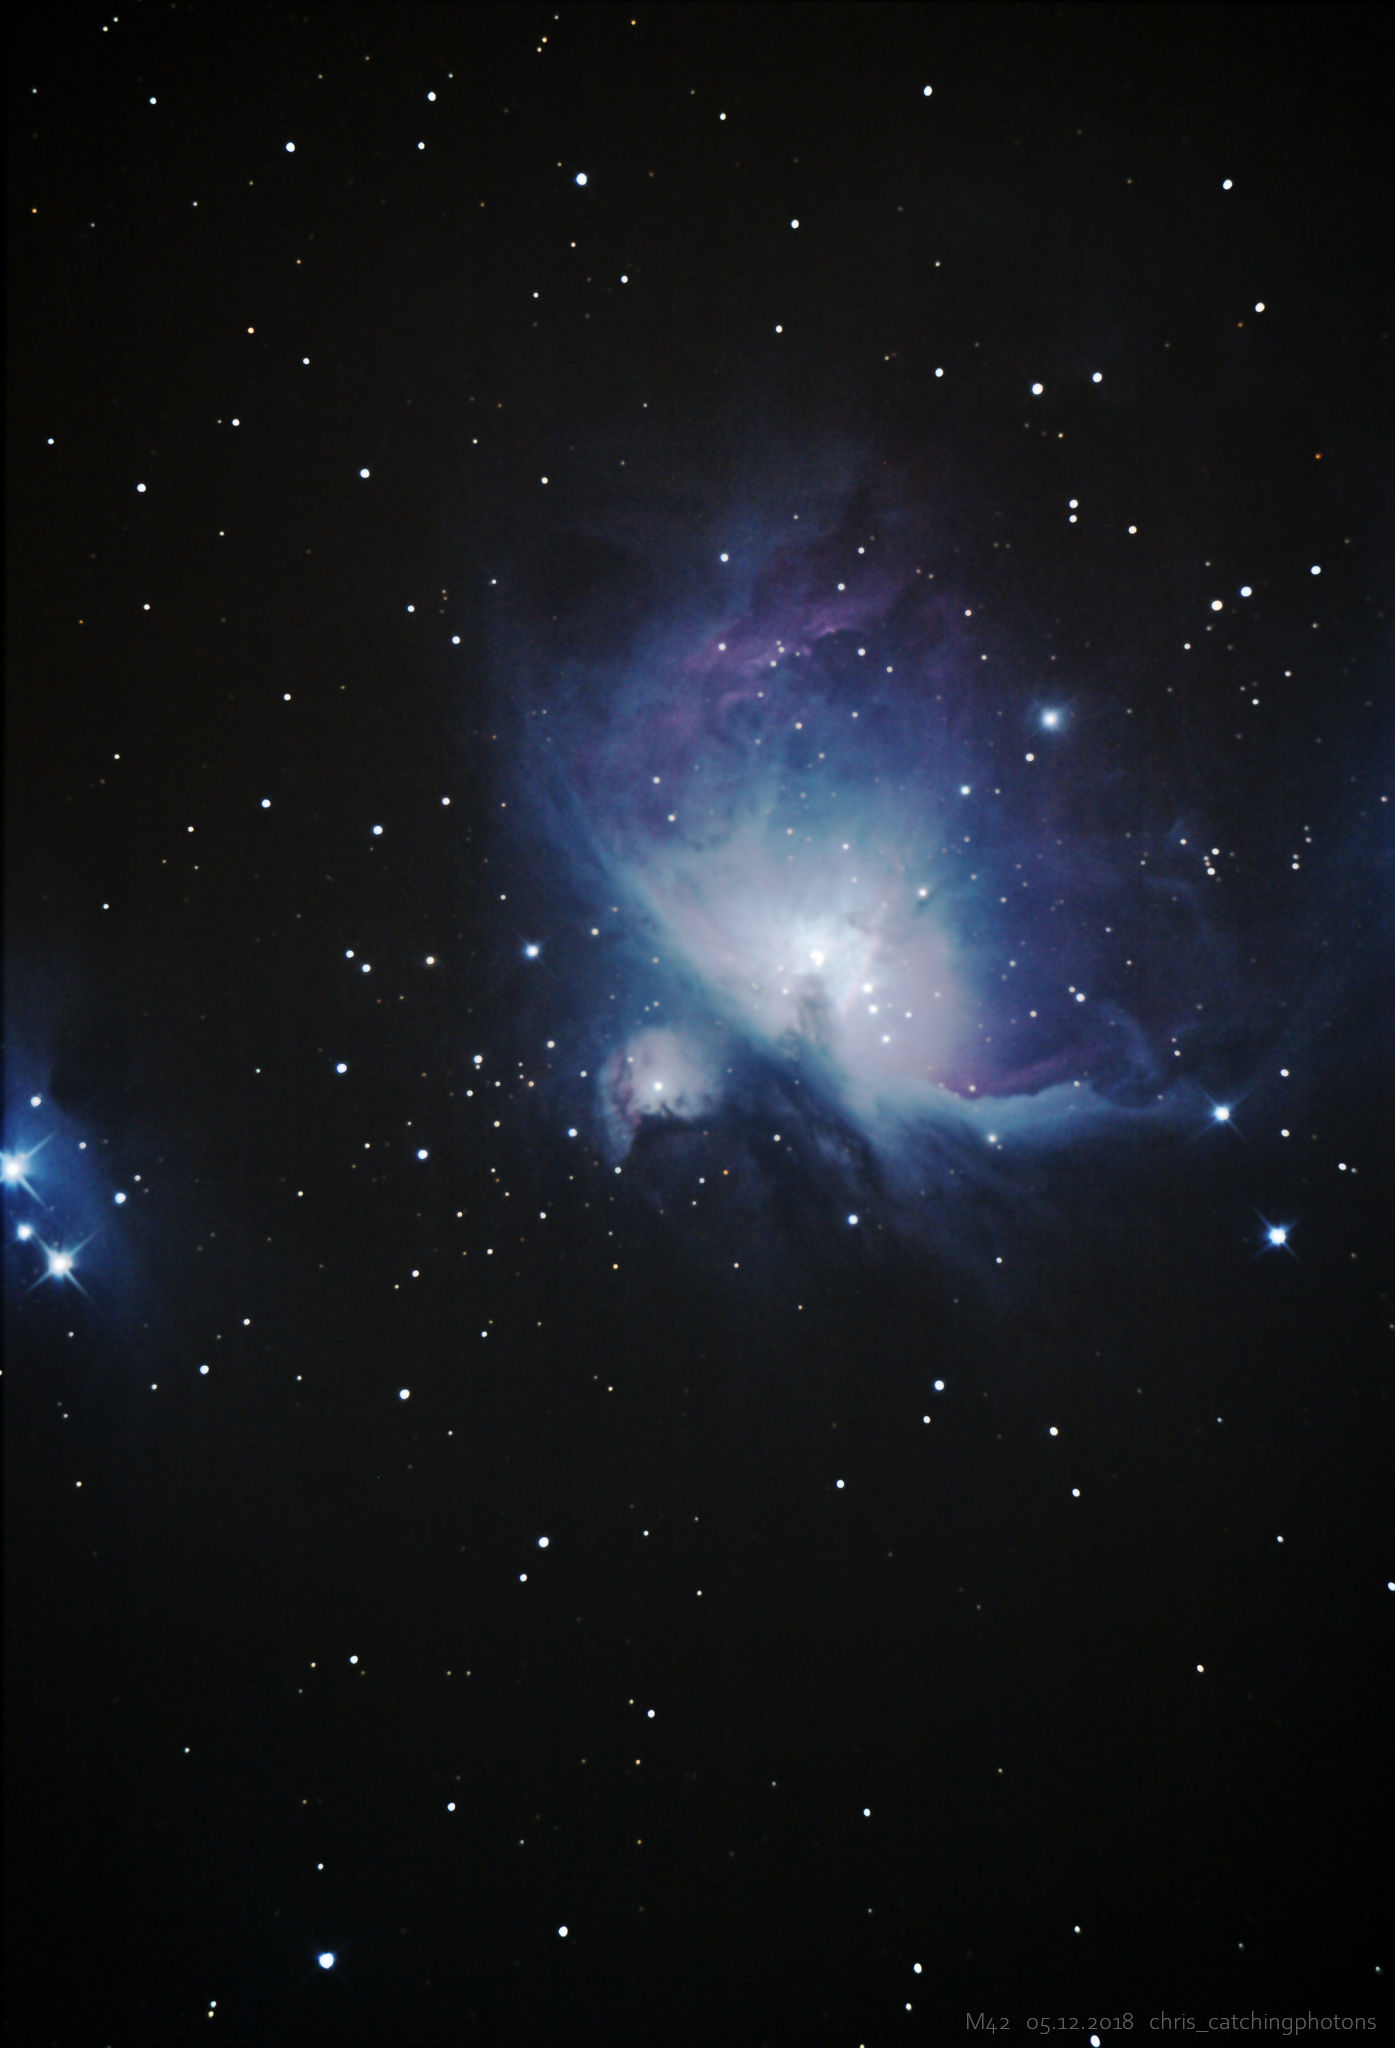
M42 Orion Nebula: Having the last test image of M42 in mind I wanted to revisit this target for a proper run as well. My framing was more like a quick and dirty but I wanted to get it running. I used ISO 400 with 1min subs as well and took another hour of data. Then I closed the evening.
Processing:
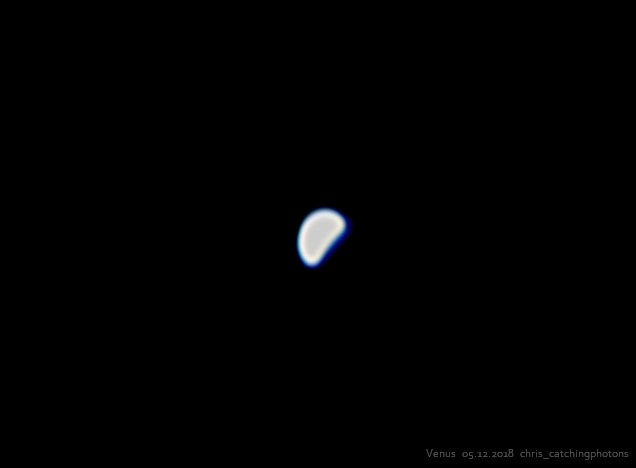
Venus: Looking at the moving Venus I decided that I needed to A) stabilizing the image and B) cutting the video file into pieces to feed that into AutoStakkert!2. The cutting was needed because on two occasions Venus even left the screen (I reslewed Venus back in!) due to my bad polar alignment. AutoStakert!2 wasn’t able to handle that (crappy) situation so I cut the file into pieces with Venus always in the frame. AutoStakkert!2 did the stacking and gave me a rather blurry blob of white. No further processing/ sharpening was able to reveal more than that. My suggestion: A) Focus was off and B) The exposure time was way (!) to high. Never the less: You can resolve the phase of Venus quite well.
M31 Andromeda Galaxy: Like with the first version of M31 every step of the processing was about revealing as much of the cloud structure as possible without pulling the background up too much. Problem with M31 is the fact, that the “background” is in reality part of the cloud disc around M31. So setting the dark level to aggressive would kill important details of the cloud structure. Furthermore the black level of the image needed to be set correctly. That was especially important because due to bad light frames I ended up with only 40 minutes of data. Stretching this data to its limits at least to be able to show some structures in M31 meant stretching it a lot. Uneven backgrounds, gradients and false colour level will then be revealed. But that is always important: Finding the sweet spot of what can be done with the image. Too aggressive stretching means introducing noise and aberrations. What can be shown in this image? What is contained within this data-set? Processing is always about finding this answer.
The first version of this image was clearly over stretched. I tried to highlight the details and the contrast of the clouds but introduced too much noise. In the second and third version of this image I tried a more gentle approach. Furthermore I tried a (for me) new technique called star reduction. When stretching an image without caring for the stars they will always bloat. To avoid this you can ether exclude the stars using a star mask or use a “minimize” function – called uniformly distributed values ~ minimum in GIMP2 – to reduce the size of the stars. The result looks much more aesthetic and realistic in my opinion. The third version was done a few months later. I increased saturation before (!) I stretched the data. That means, that colour differences are stretched as well and that different colours of stars are much more visible.
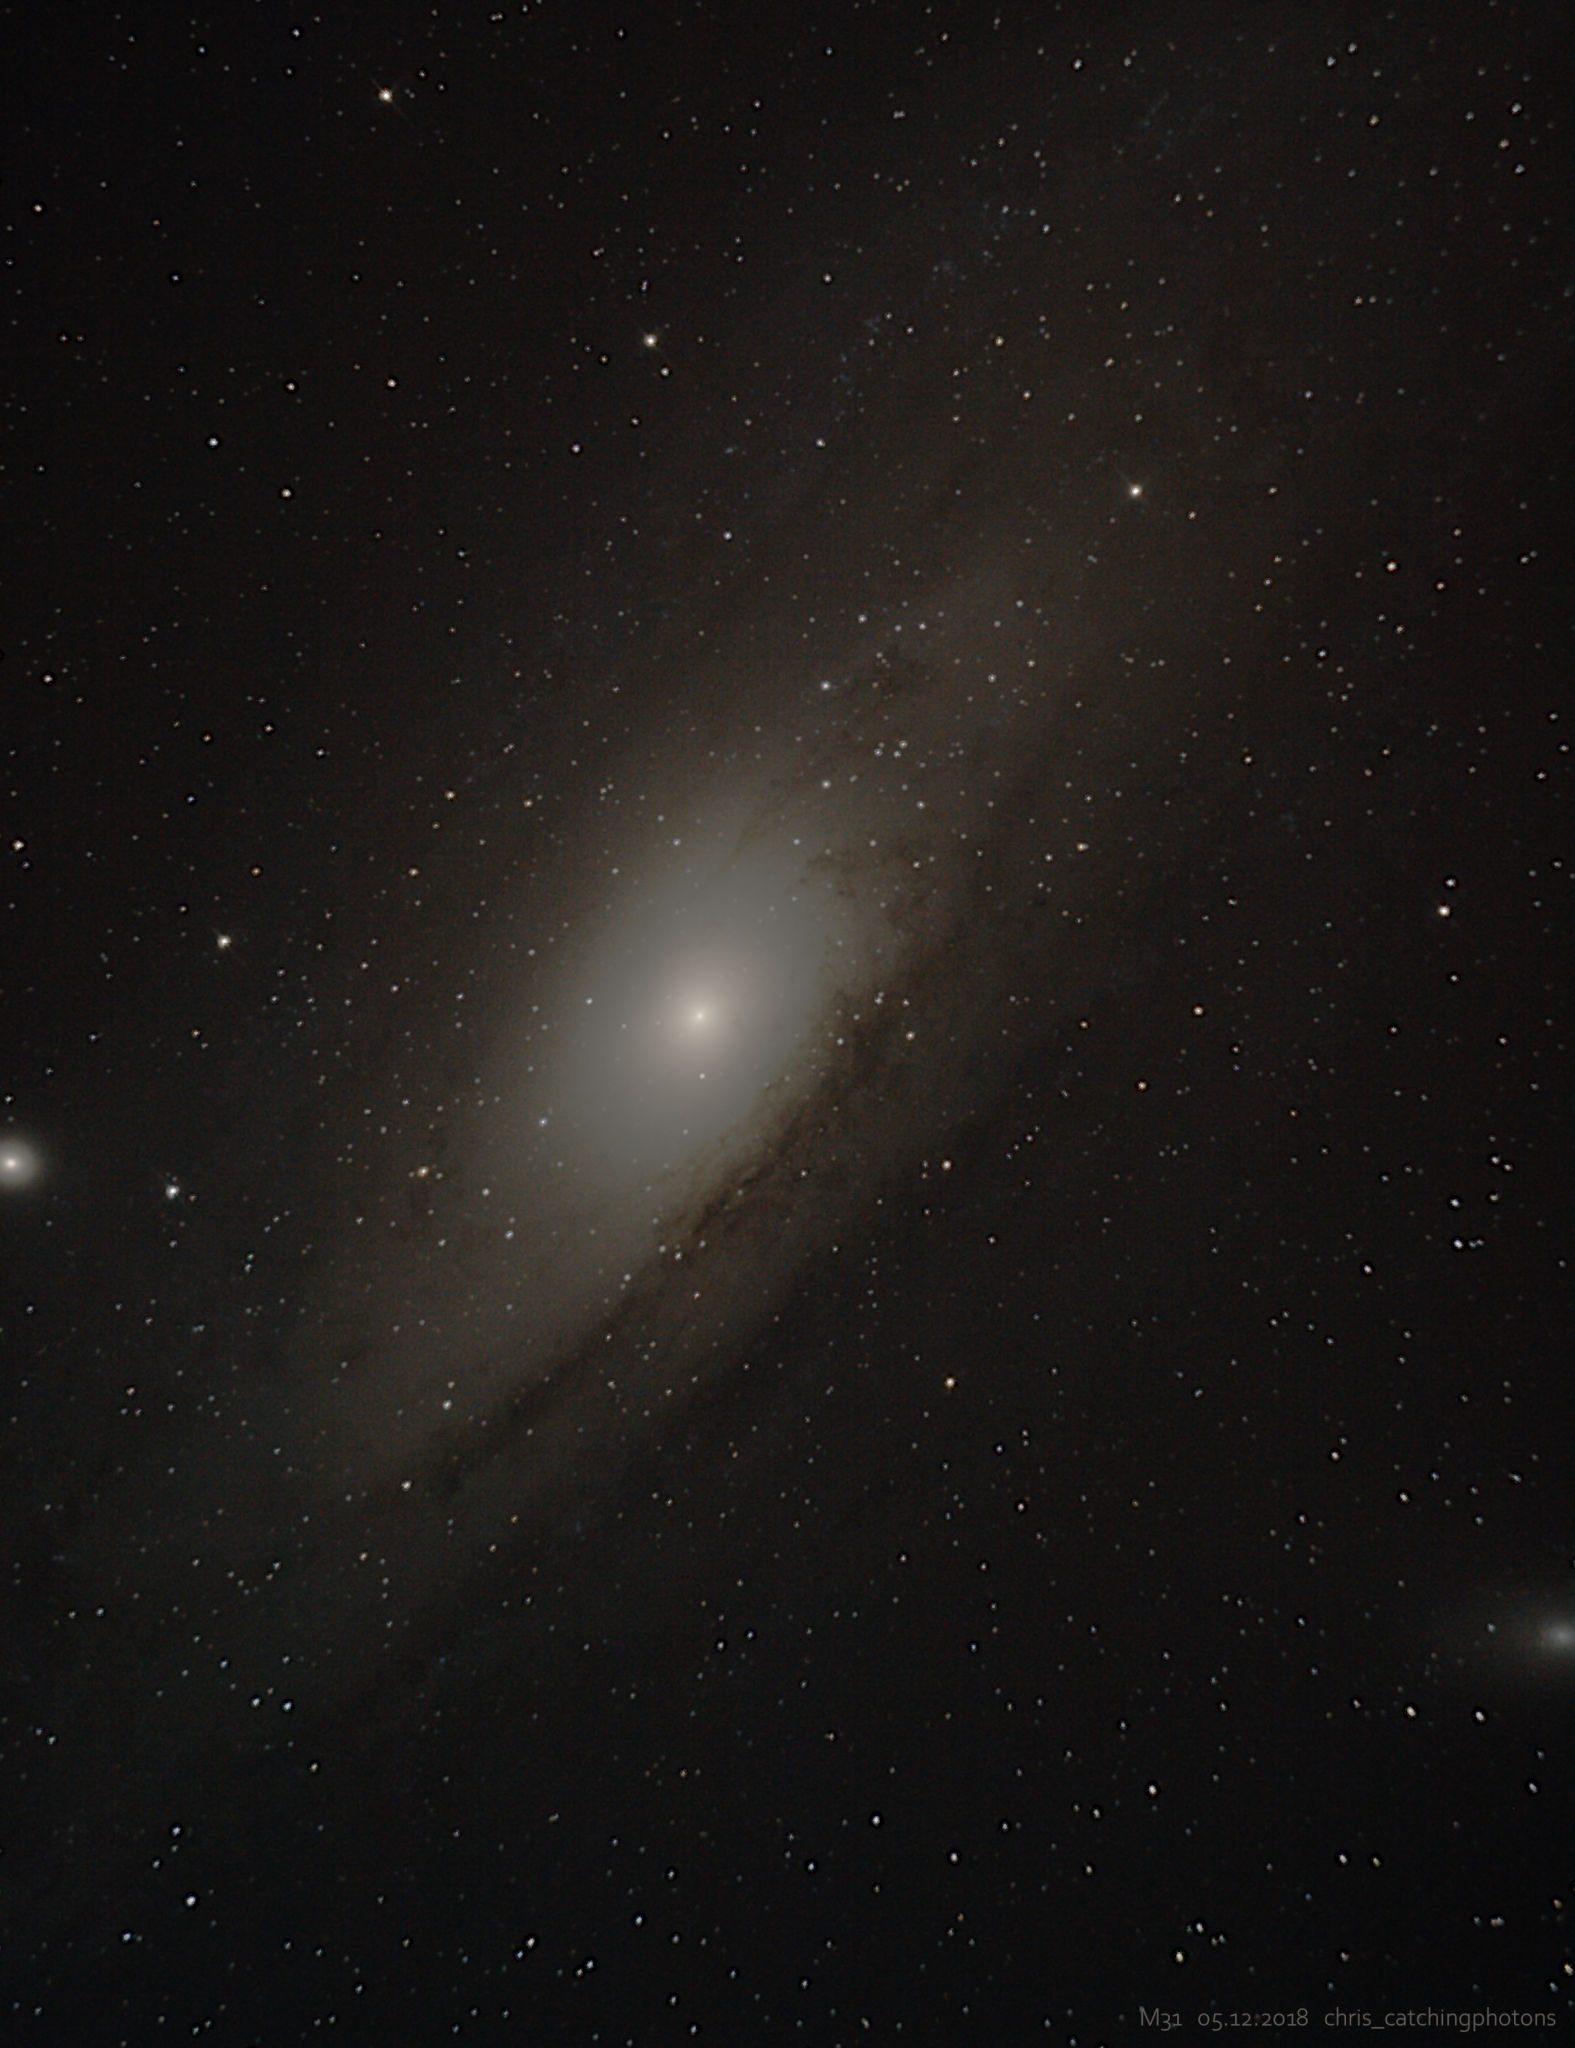
M31 Andromeda Galaxy – 40x 1min Sub @ ISO400 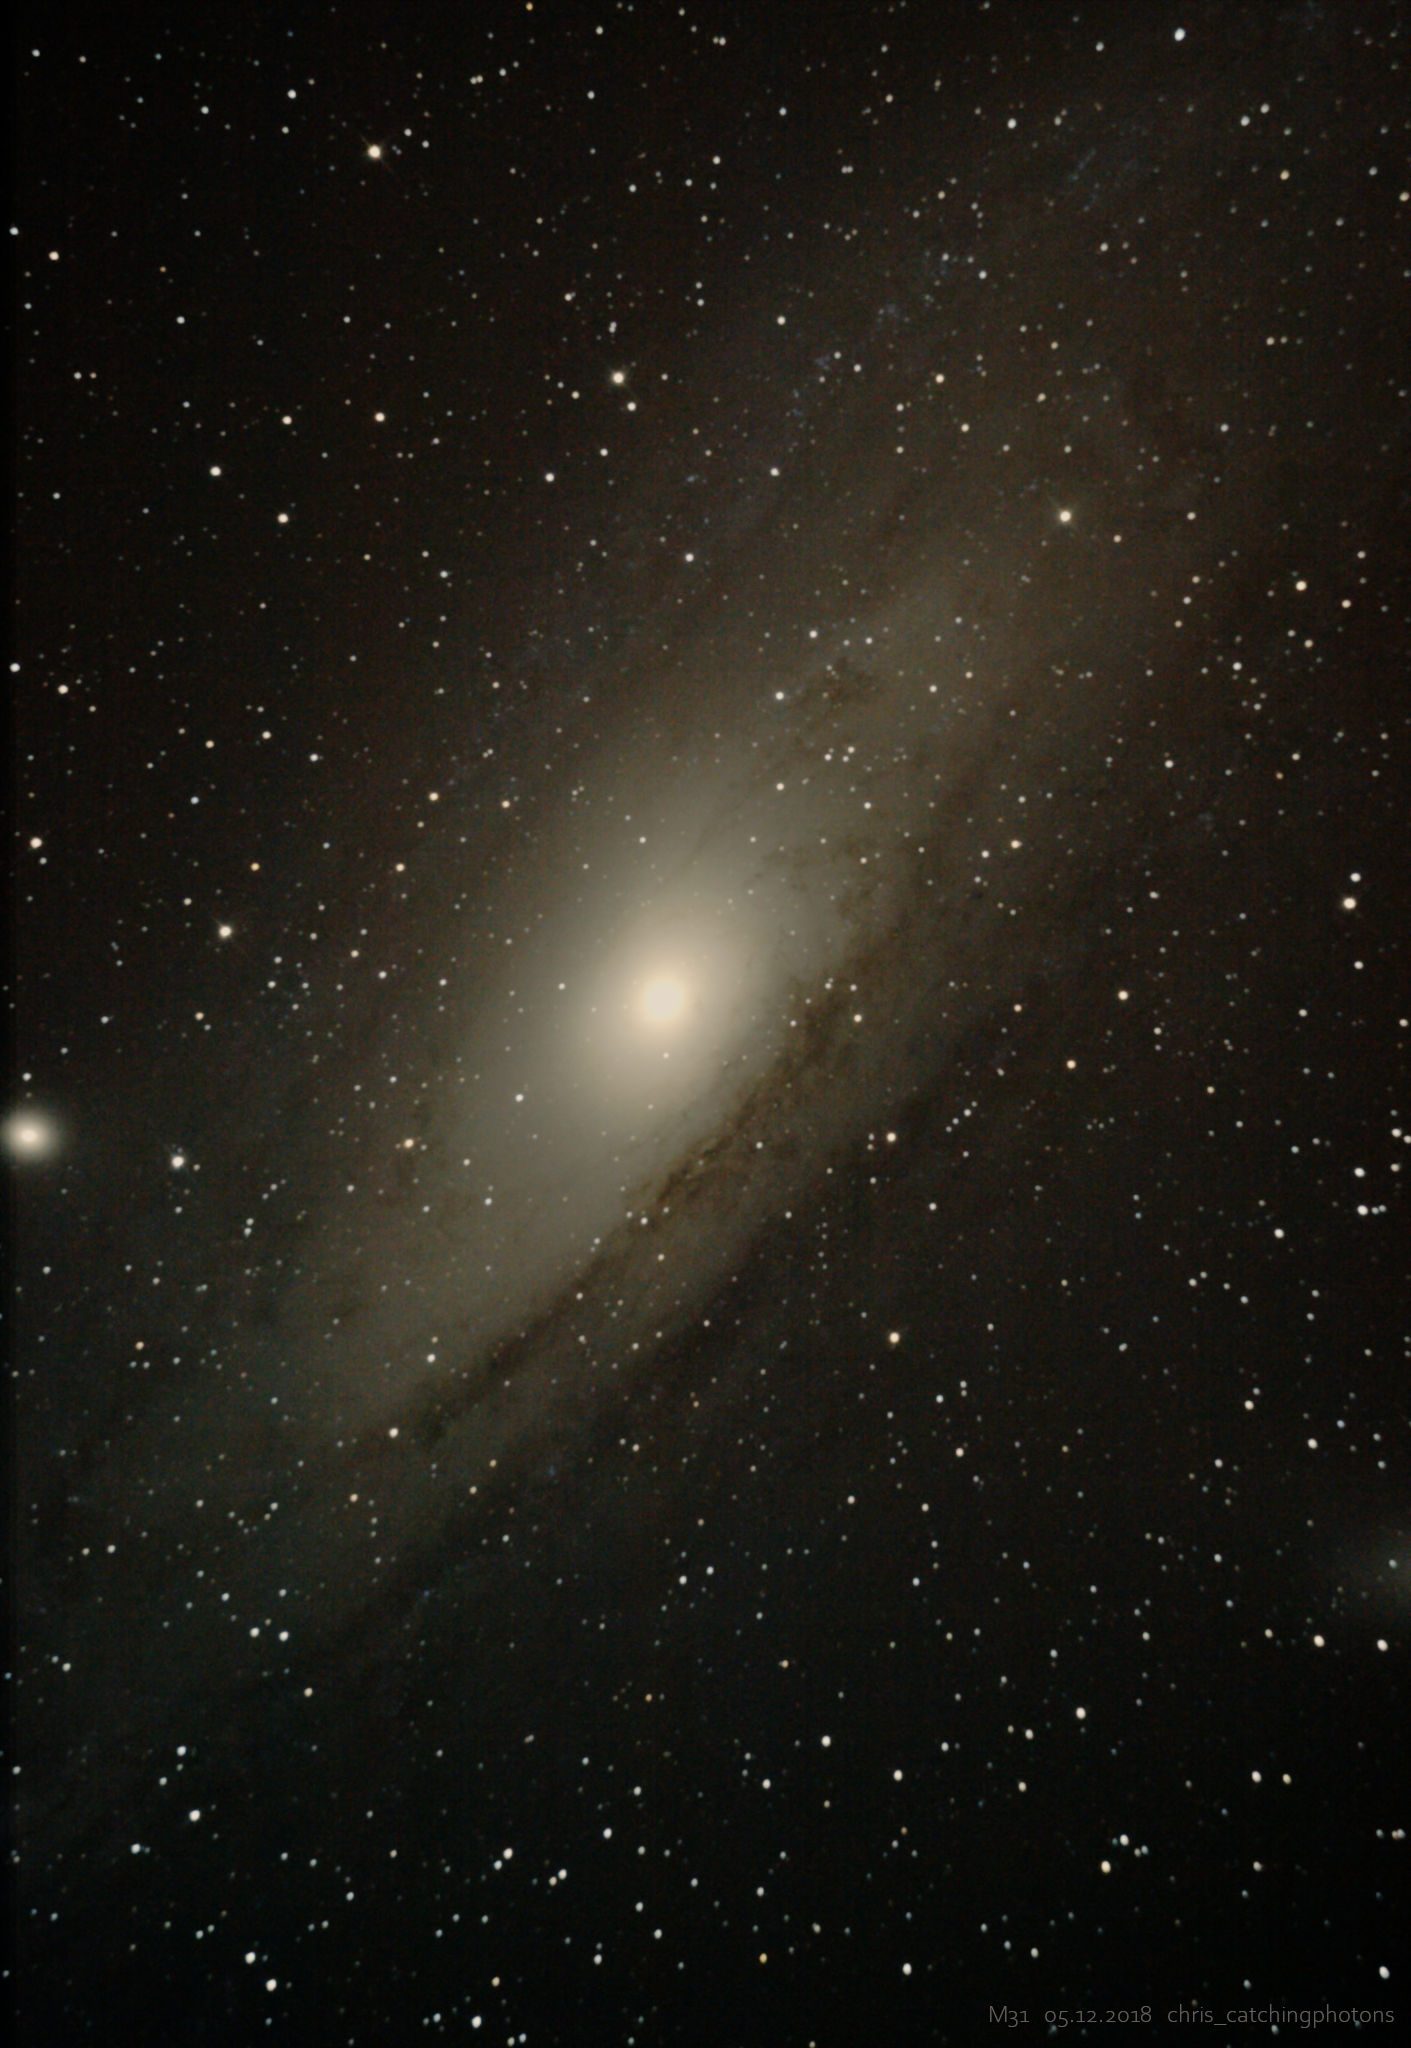
M31 Andromeda Galaxy – 40x 1min Sub @ ISO400 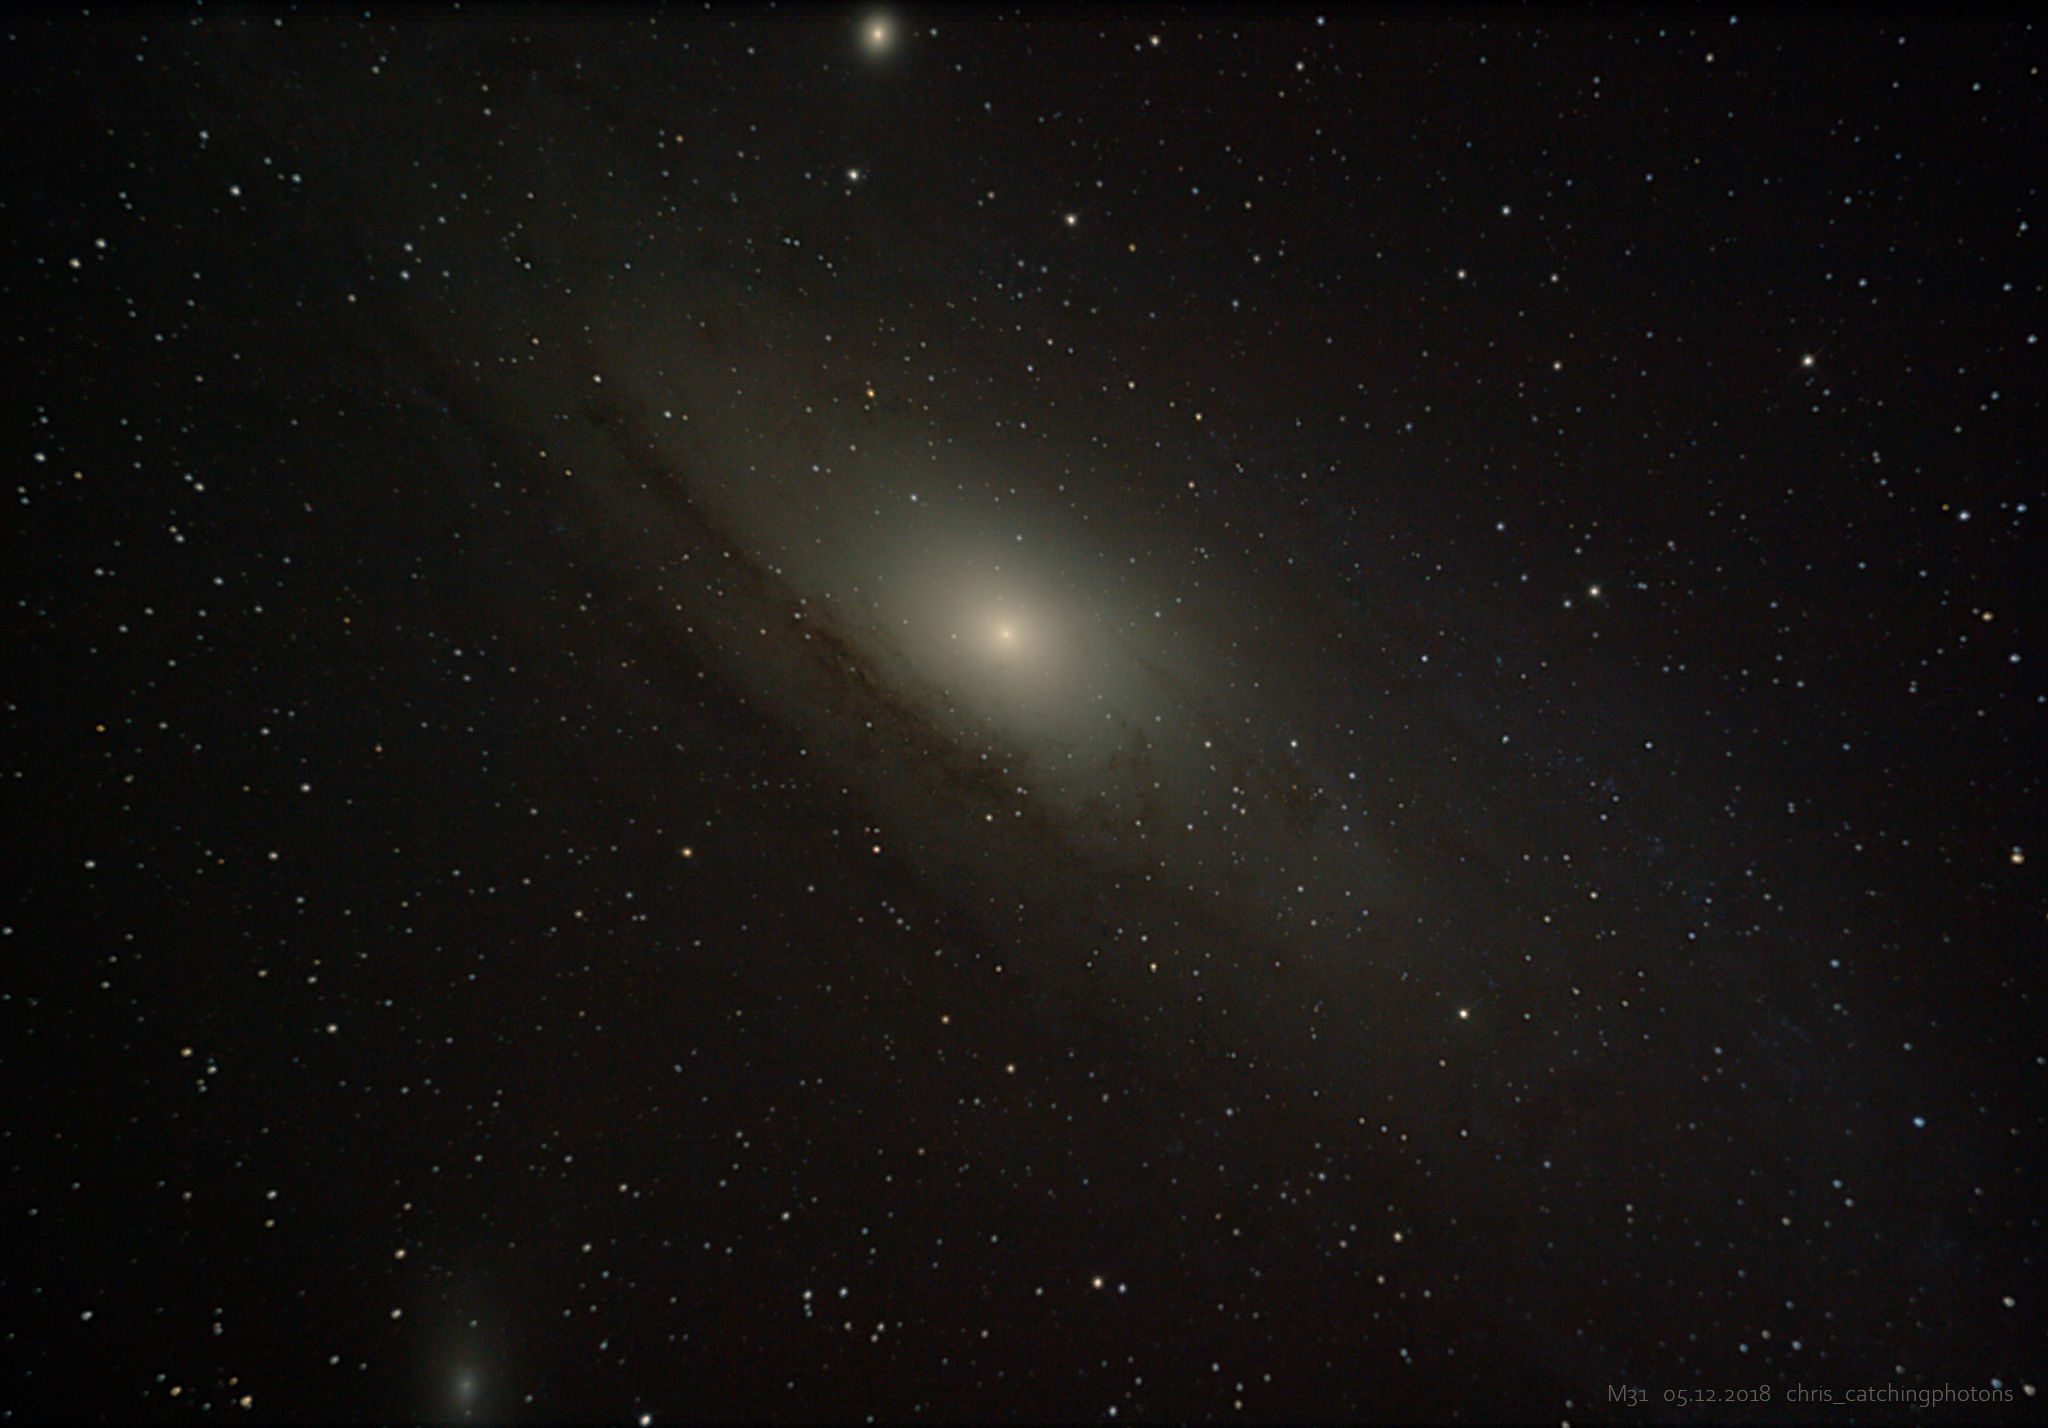
M31 Andromeda Galaxy – 40x 1min Sub @ ISO400
M42 The Orion Nebula: Processing the Orion Nebula was all about the balance between the outer layers and the core. With only 31 minutes of data I already had to deal with a certain amount of noise and a low signal to noise ratio. So stretching the outer layers of the nebula too high wasn’t a viable option ether way. The core of M42 on the other hand is a very bright region. So even with my limited amount of data stretching the outer regions means overexposing the inner core of the nebula. As I wanted to show structural details and stars in the core region as well as fainter structures in the outer nebula areas I tried different methods to balance the stretching between the two regions. Method one I used is to use layer masks. With a layer mask you can alter the settings of one area and leaf out other areas. A second (nearly the same) is to manually edit both the core and the outer area each in a separate image. Then layer the two images on top of each other and choose a transparency area for lets say the core. Whatever… I was totally amazes by this target. Only thing that I was sad about was the limited amount of data I collected… so coming back to this target was a must!
Conclusion:
Venus: Another camera! No kidding… the settings with the Logitech driver settings are just too annoying for that kind of usage. Without the proper settings of the exposure time it’s hard to focus and then everything is lost. I know that you can hardly see any details on the surface but that blurry image I got: I can do better!
M31: Too little time again! When will I stop violating the “one thing an evening”-rule? Jokes aside. I managed to massively improve my last image of M31! I was able to gather dust and star forming regions. I refined the processing and even got colour informations of stars around M31. The FOV from my scope is insufficiently small. Ether I need a new camera with a bigger chip or I might try stitching images together. All in all I really like the new image of M31.
M42: The jewel! Since I first spotted M42 I wanted to to a decent image run on that target! Like anyone I guess. It’s a brilliant beginner target. Even without much data or processing skills one can produce a satisfying image with dust lanes and fainter areas as well as bright and shiny core areas and big spiky stars! It’s clearly an image you can show friends when they ask about what the heck you are doing out there in the night. I will return to that target, soon, as I want to grab some more data!
Greetings,
Chris